Sunday, October 31, 2010

Pumpkin carvings..


Friday, October 29, 2010

November - National Pomegranate Month!


Poms are known in arabic as "Rumm aan" and they're one of my favourite things in the whole wide world.
A lot of people find cleaning them to be a chore but I've always loved and enjoyed this task. The fruit is so amazing with all it's chambers and membranes inside, it's just fun to snap the little seeds off and hear them falling into the bowl. Before my sisters and I could dig in we'd sprinkle them with a bit of salt then just eat it all up with a spoon. Yummy!

It's national pomegranate month, yay! Love seeing all those pomegranates in the stores for such a good price, since normally they are rather expensive here in the west. Pom seeds are great on rice as a garnish, make a nice sour burst of flavour in a salad, or just a healthy antioxidant packed snack!! So many ways to enjoy..

Wednesday, October 27, 2010

Key Lime Bundt Cake


I'm all about seasonal freshness and local food, if I see vine tomatoes but the sign says product of usa or mexico and I'd much rather go for the hothouse tomatoes grown locally.

I'm also a bargain hunter so today I saw key limes, tons of them on the clearance rack, two little sacks choved onto a tray and wrapped up with plastic and a sign that says 1.49. I figured I'd give them a try since they looked pretty ok and I've been eyeing them over the summer but their price is usually close to $4.


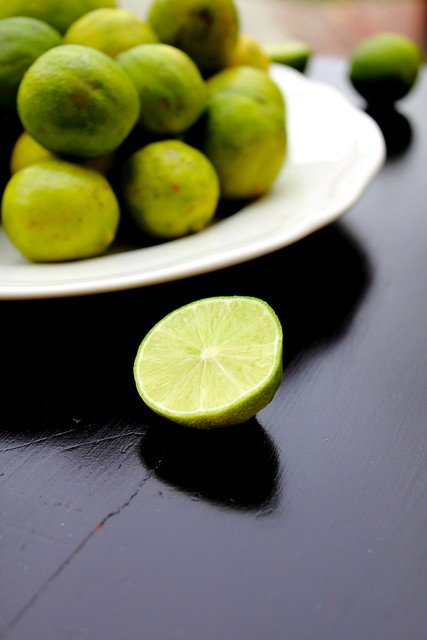
The key lime always confused me, I've never tasted them before and I hear they are used for pie - the fameous key lime pie - but I don't have much of a sweet tooth and pie isn't my thing really, especially a citrus pie with meringue .. not my thing at all (please don't kill me lol)

When I was younger in pakistan my mother used to give us a lime type of fruit that was very sweet, and delicious but this isn't the same thing at all. I've not yet located any of those in the west yet, but my search over those sugary limes is not over yet!

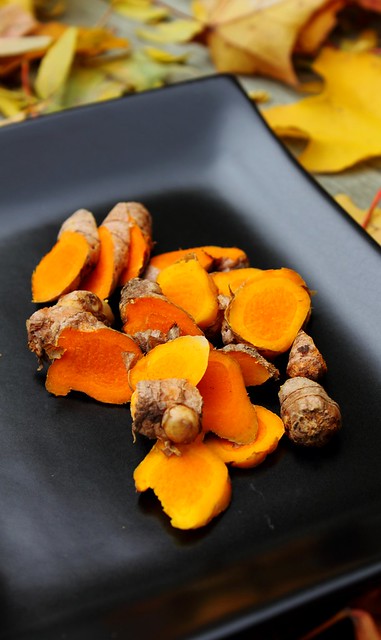
Wiki says key limes are loomi amani, which is a dry lime that is brown in color used in arabic food, to flavour stews and rice, and all sorts of dishes, very popular in southern iraqi cuisine, as well as all over the gulf and parts of the middle east as well as persia where it's called leemo. Being of middle eastern backround I can work with this.

If I can dry the rest of these babies successfully (unlike the baby cherry peppers I hung from my window which resulted in a scary moldy interior -ewe! ) then all should be well and I'll have a huge stock of some dry lime for my cooking.

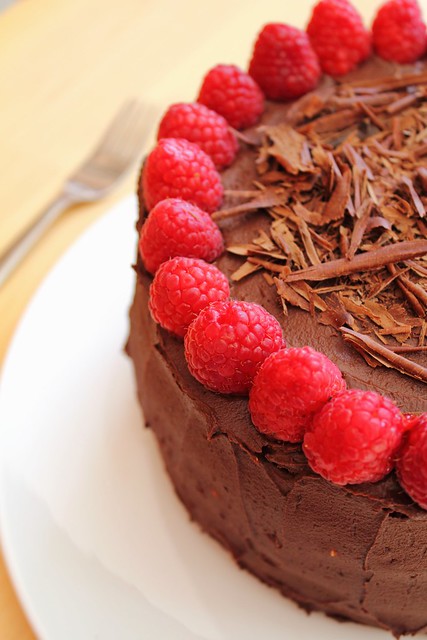
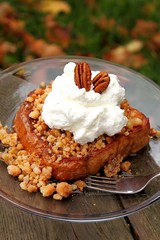
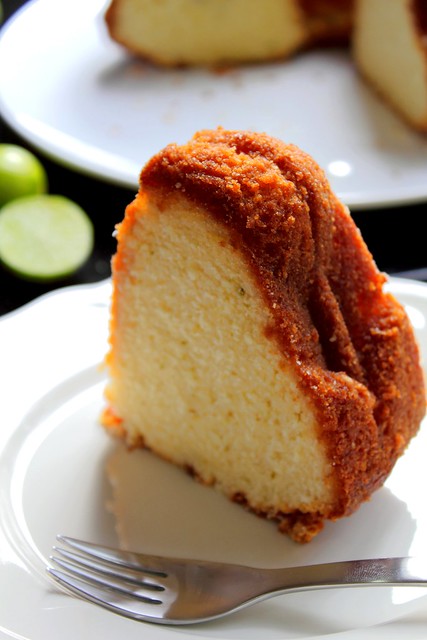
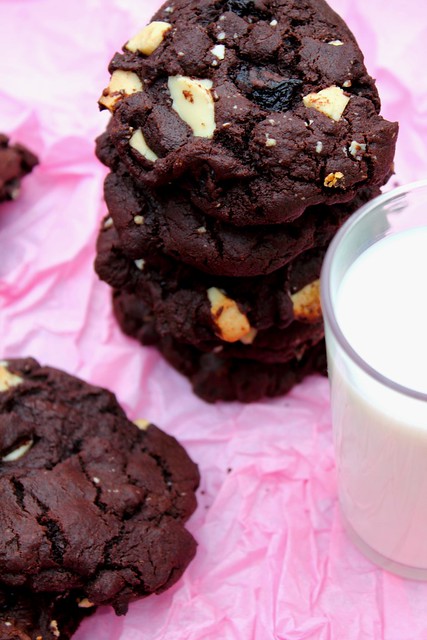
Not a fan of the pie as I said so a cake sounded just right. I LOVE CAKES! Especially plain sort of cakes.


Here's a good time to use the kitchen aid mixer or a hand mixer because you'll have to trust me on this, after zesting and squeezing the juice out of all those little limes the last thing I wanted to do was use a whisk.

Took me a bit to figure out what the breadcrumbs were for, I've debated whether to use panko or ordinary ones and it's a good thing I didn't season my homemade breadcrumbs with salt, pepper or anything like that because I was thinking of it last week.

Upon some searching online I found a blog which mentioned not to use panko, and instead a fine regular sort of breadcrumb so I went for that instead and seems it is a trick used for bundt pans to prevent sticking I guess. Learning something new everyday!

Moving on to the recipe. I've zested close to 10 key limes even though the recipe calls for three, why not I say - go big or go home - and their juice made EXACTLY 1/2 cup for the syrup. Yay!

Upon tasting the batter I found it to be just right, tasted like a green fruit loop to be honest, so I'm glad I went for more zest.

Next time I'll use coconut milk instead of regular, and see how that turns out!
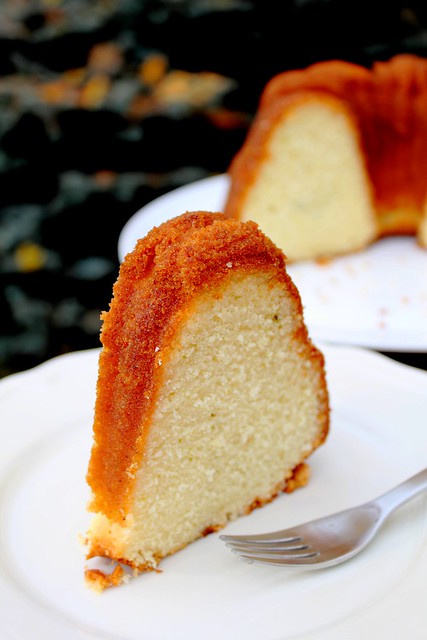
My cake baked for exactly 1 hour, so keep an eye on it, Also I've placed another tray under the bundt to prevent any browning because my oven is hotter than the norm.

Recipe for Key Lime Bundt Cake

Best made the day before. Helpful to have one of those microplane graters for lime zest. I think I use a bit more zest than the recipe calls for. Enjoy!

Fine dry bread crumbs & softened butter (for coating pan)
3 cups sifted all-purpose flour
2 tsps baking powder
1/2 tsp salt
8 oz unsalted butter, at room temp.
2 cups sugar
4 extra large or jumbo eggs (I often use 5 large eggs)
1 cup milk
Finely grated zest of 3 limes, preferably key limes

Glaze:
1/2 cup fresh key lime juice or 1/4 cup each lime & lemon juice
3/4 cup sugar

Oven 350 degrees
Butter 10 inch tube pan (I use my Bundt pan) and sprinkle w/ bread crumbs (coat - use a lot of butter)

Sift together flour, baking powder, salt and set aside.
Beat butter till soft, gradually add sugar, beat 'till light & fluffy. Beat in eggs one at a time, scraping down bowl after each addition.
On lowest speed, alternately add dry ingredients & milk, scraping bowl as nec. and beating just to mix each addition.
Stir in lime zest by hand.
Pour half the batter on one side of pan, half in other. Level top by briskly rotating pan back and forth.

Bake until cake tester comes out clean, about 1 1/4 hours. Let cool slightly on wire rack - 10-15 mins.

Stir lime juice and sugar together just to mix.

Place cake rack on tube pan and invert and place rack over foil. Using pastry brush, brush glaze all over warm cake until completely absorbed. Brush on any glaze that drips onto foil.

Let cake cool completely & transfer to cake platter. Let stand loosely covered for several hours or preferably over night. When ready, outside of cake will be completely dry.

Thanks to MMRuth, a chowhound member for this recipe. It is a delicious cake and I'll be making it again and again!!!

Sunday, October 24, 2010

Cheddar Thyme Gougères


These are Cheddar-Thyme Gougères with creamy goat cheese filling!! A little time consuming but really great Hors d'oeuvres

Basic Recipe
Makes about 4 dozens
Ingredients:
  • 1 cup whole milk
  • 4 tbsp unsalted butter, divided
  • 1 cup all-purpose flour
  • 1 tsp salt
  • ¼ tsp freshly ground black pepper
  • 4 large eggs
  • 1 cup grated Cheese (of your choice)

    2-4 sprigs of thyme, with leaves removed and chopped roughly. (about 1 tsp of the final product)
Preparation:
Position a rack in the top third of the oven, and heat the oven to 425 F. Line a large baking sheet (or two) with parchment paper or a silicone mat.
Heat the milk and 4 tbsp butter in a medium saucepan over medium-high heat, stirring occasionally to keep the bottom from burning. When the mixture is simmering and the butter is melted, remove from the heat and add the flour, salt, and pepper all at once. Stir well with a wooden spoon to combine. Return the pan to medium heat and stir hard for 1 to 2 minutes, until the mixture thickens further and becomes stiff.
Transfer the mixture into a bowl of the stand mixer fitted with the paddle attachment. Mix the dough on medium speed for a minute to cool the dough slightly. Break the eggs into a liquid measuring cup or a bowl, lightly whisk with a fork. Add the eggs gradually, in 4-5 additions beating well after each portion has been added to incorporate it into the dough. Remove the bowl from the mixer base.
Chop the thyme finely and add to the cheese mixture and blend it in at the end with a wooden spoon. They were not overly salty but you can add a little salt to the mortar and pestle with the thyme to crush it, or on the cutting board to scrap and chop so aromatics are released.
Transfer the mixture to a pastry bag with a large plain tip. The mixture will still be warm.
Pipe the mixture onto the prepared baking sheets in mounds about 1 inch in diameter, leaving a couple of inches between them. Smooth out any points with a wet finger.
Unbaked gougères can be frozen on the baking sheets. Once the dough is completely frozen, transfer the piped shapes into freezer bags. They can be kept in the freezer for up to a week.
Put one baking sheet into another to isolate the pastry bottoms from strong heat and slide the baking sheet into the oven. Bake for about 12 minutes, until the gougères are well puffed. Reduce the oven temperature to 375F and continue baking until golden brown, 10 to12 minutes more. Let them cool slightly on the baking sheet.
If baking the previously frozen pastries, there’s no need to completely defrost them before baking; just let the frozen gougères sit on the baking sheet on a counter while the oven is preheating.

Thanks to Source for recipe


For the filling I added some lemon zest and black pepper to some goat cheese whisking it with a bit of sour cream, yogurt or creme fraiche for a smooth filling.

Pierogi lunch


Pierogi lunch
Originally uploaded by Adventuress Heart
Store bought saurkraut and mushroom pierogi boiled then pan fried for crispy crusts, served with caramalized onions, chive and sour cream of course!

Potato pierogi are great, but these are my go to pierogi when I don't want to feel guilty. lol.

It's great having them in the freezer, normally they're my midnight snack where I boil up a few and sometimes pan-fry or sometimes not and just eat a big bowl with yogurt. Forget ice cream, with my "savoury tooth" this is my kind of indulgence.

Saturday, October 23, 2010

- THE - BEST chocolate cookie

Cherry Chocolate Chunk Cookie

THE best chocolate base cookie, chewy, moist, chocolaty, brownie like, semi soft and so delicious!
I've added both white and dark chocolate chunks and 1/2 cup halved dried cherries, the recipe yields 12 larger cookies for me.
Try adding spices for a chocolate mexican cookie or cranberries, nuts, candy .. the possibilities are endless.

INGREDIENTS

1 cup all-purpose flour, sifted
1/2 cup cocoa powder, sifted
1/2 tsp baking soda
1/4 tsp baking powder
1/4 tsp salt
1/2 cup unsalted butter, at room temperature
1/2 cup sugar
1/2 cup light brown sugar
1 large egg, at room temperature
1 tsp vanilla extract
6 oz white chocolate, chopped into chunks

DIRECTIONS

In medium bowl, combine flour, cocoa, baking soda, baking powder and salt; set aside. In stand mixer with paddle, mix butter and sugars on low speed for 30 seconds. Beat until fluffy on medium-high, about 2 minutes. Turn to low, add vanilla and egg, mixing until combined. Slowly add dry ingredients until combined. Stop machine and fold in white chocolate by hand.

Line 12-by 18-inch baking sheets with parchment paper. Drop heaping tablespoons of dough 2 inches apart on trays and lightly flatten. Bake on middle rack of 350F oven until puffy and cracked, 10 to 12 minutes. If pans won't fit side by side on middle rack, use top and middle, switching trays halfway through baking time, quickly, to maintain oven temperature.

Cool completely before storing in airtight container for up to 3 days.

Makes 30 cookies

Source


Wednesday, October 20, 2010

Shawarma: Attempt number 1

Marinating: doesn't look too yummy in this stage.
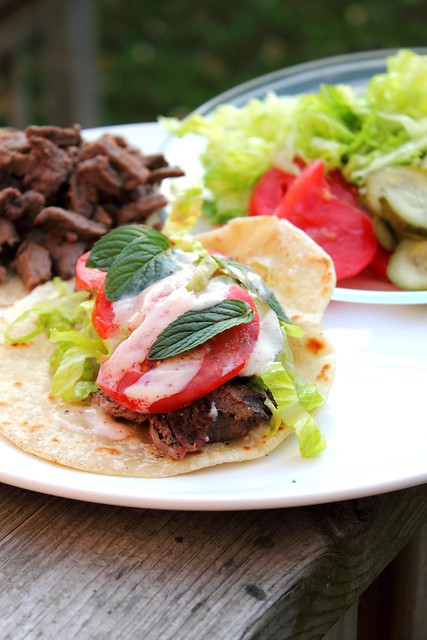
Grilling up..
And here's the neighbourhood kitty that came to check out the yummy smell!
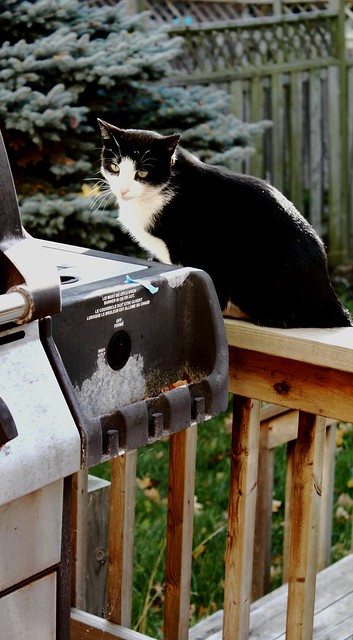
Yummy! At this point it smells great and so does the whole neighbourhood.


Shawarma

This recipe is for 4 medium steaks.
I'm not exactly sure what kind of meat is good for this recipe but I used a marinating steak that was similar to flank but not quite as tough.

Next time I think I'll try something with more marbling, like a sirloin, I think some melting fat would add more flavour and add moisture. Something similar to what I would do for a kebob on a skewer.

Anyway.. here it goes, same recipe as my salmon Shawarma I've blogged about years ago:


- 2 cups plain yogurt
- 1 onion, 4 cloves of garlic finely minced in food processor
- 1/2 cup olive oil
- 2 tbsp white vinegar


Spices
- 1 tbsp curry powder
- 1 tbsp ground cinnamon
- 1/2 tsp ground cloves
- 1 tbsp dry ginger or fresh paste
- 1/2 tsp dried mint
- Smoke powder or liquid smoke
- black pepper

Salt


All the spices go into a bowl with the yogurt and aromatics, everything except the salt or that will draw moisture out of the meat so leave that for later.
The meat was cut against the grain in medium thin ribbons, and they went into the marinated and got coated nicely.
I've omitted the curry powder this time but it's been in my mothers original recipe.

The next day I removed the meat from the fridge and let it come to room tempt, shaking off excess marinade lightly and salting it.

At this point I was trying to figure out what the best approach was to cooking them, salmon biryani always got cooked in the oven but it could be done stove top. Tandoori chicken I've made in the past also in a yogurt marinade did well in a skillet or on the BBQ. This time I decided to go with the BBQ so I lit it and the pieces went on against the grill. If you have one of those baskets that goes on the grill for smaller things like veggies that would have been ideal.

Flipping them once they cooked fairly quick and then I let them rest on a plate.

The pieces were still quite large so I cut them yet again on a diagonal in smaller pieces and having no pita bread in the house (I know I know, totally unacceptable for a middle easterner!) I went with a tortilla that was homemade and frozen from the time I made fish tacos, it got grilled up in the skillet really quickly and was really delicious and fresh tasting!!

Here's the dip recipe:

Shawarma tastes good when left to sit a bit, as the flavours seem to get more intense, so leftovers are really yummy.

Have all ingredients on hand: Pita bread, chopped veggies (tomato, lettuce, pickles, cucumbers, fresh mint.. etc) for sandwhiches and make the dip by mixing:

- 1/2 cup tahini
- salt
- sumaq (can be found in middle eastern shops, leave out if not available)
- pickle juice or water
- fresh lemon juice or citric acid crystals
- 2 tbsp mayonnaise, sour cream or yogurt (optional)

Whisk together the tahini with the spices and add the water/pickle juice mixture gradually until it thickens, it may seperate at first but keep whisking and the mixture should come together and form a creamy dressing like consistency.

Enjoy!


Give it a try, and if you come up with an improvement on what cuts of meat to use or method of cooking let me know, I'm definitely going to try to prefect the process as best as I can.

I've got a nice rotisserie option in my toaster oven that makes a gorgeous chicken, so if I somehow figure out how to use it for a shawarma that could have potential! Maybe chicken shawarma at least.

Sunday, October 17, 2010

Simple comfort foods


Sometimes the simplest things in life are the best, like tomato soup and a cheese sandwich.

After a long day of organizing, it was just the perfect "lunch"

Brie sandwich in the back while chive cheddar sandwich is being made.


A variation on the soup is the roasted tomato soup.
Roasted tomatoes: chop ripe tomatoes, drizzle with olive oil and season .. bake on a low temperature until the flavours concentrate, peel and use in dishes. Puree for the soup with some stock.

To accompany it is a creamy artichoke garlicky grilled pita sandwich with some olives, very Mediterranean.


Project Pantry - Done!


So so so excited about this!!! The project came together beautifully - a custom built cedar heavy duty shelf perfect for all the kitchen things for a functioning kitchen while cabinets/counter tops get renovated/installed.

If you're like me and love to organize then this is a dream come true.

The walls are done in Lowes Valspar "Peach frenzy" which looks like a creamsicle.


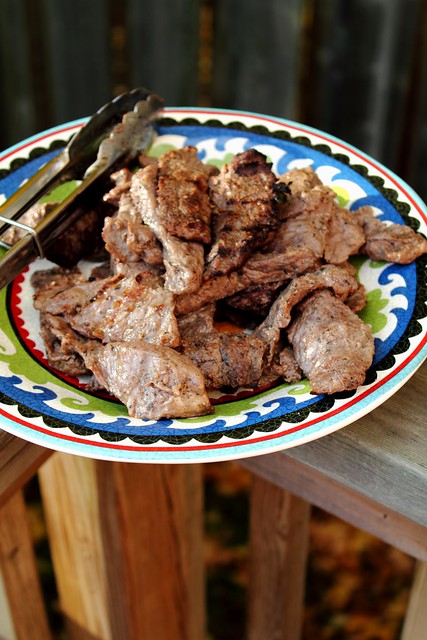
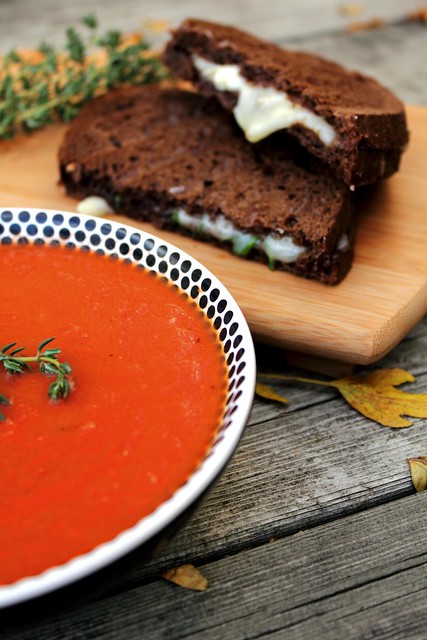
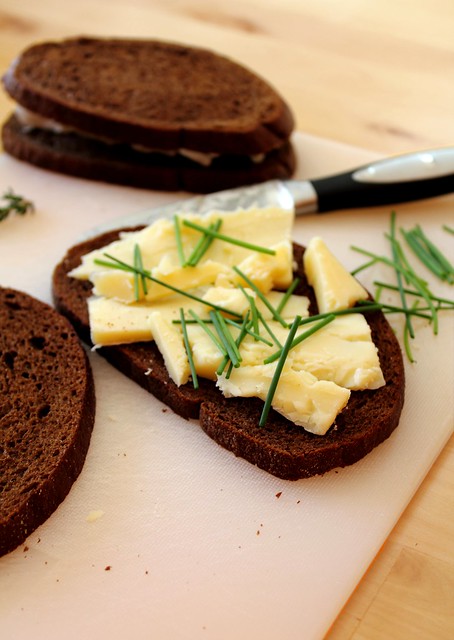
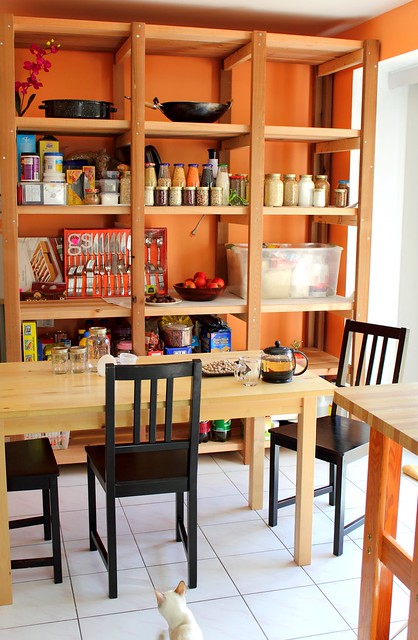
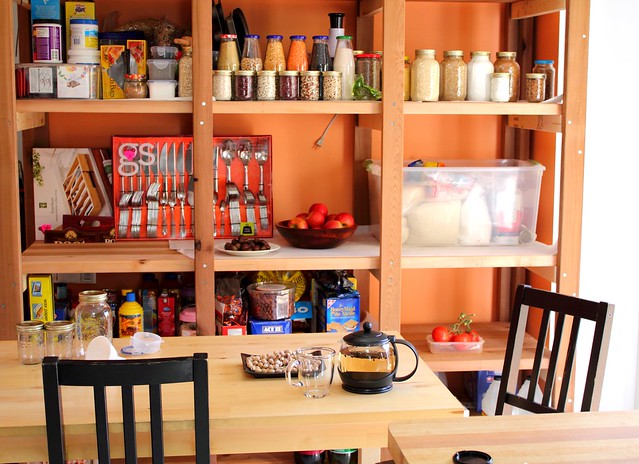
A little stocking there... little snacking here...


Saturday, October 16, 2010

Raspberry dark chocolate cake!


I rarely go all out and make a cake, that's more my sisters department as she's an excellent baker but today I've had some help, for the most part and this cake was practically instant.

The cake part is a recipe for black forest sponge cake, recipe here The last time I've used this recipe was for a black forest cake and it was really delicious, light and spongy, like a bakery style cake.

The filling is pink, you may not be able to see that much in the picture but right now, about 24 hours since I've made it the color has darkened in the fridge. It's basically a whipped cream with homemade sweetened raspberry puree that I defrosted from last years raspberry picking trip.

When the cream comes to the soft peak stage the defrosted fruit puree is added in and then it's whipped up, the site here explains adding fruit purees to whipping cream, I was very worried about this stage because my buttercream split last time I mixed it with whipping cream so the thought of adding anything liquid to whipping cream terrified by but it went very well.

Finally it was frosted with a frozen ganache I had in the freezer as well for about 4 months now, I left it in the fridge overnight then let it come to room temperature and beat it with the paddle attachment while slowly adding some heavy cream to make it softer and more buttercream like (because ganache can be very stiff and hard)

A thin crumb coating went on first, then I let it sit an hour in the fridge and then the final layer was applied with the decorative raspberries and chocolate curls.

Super super easy cake, the dark chocolate raspberry combination is classic, do give it a try!


Friday, October 15, 2010

Yellow


Lots of yellow going on today.. it first began with a bit of turmeric root I picked up at the local chinese supermarket.

Have been holding onto it for a while but couldn't quite figure out what to do with it other than throw it in some soup while I had a cold last week to hopefully extract some of benefits and help with a speedy recovery.

Here is a family favourite recipe I grew up with, to be perfectly honest I didn't enjoy it as a child, something about it was too sweet and I'm a savoury person all the way but now having grown up I can really appreciate it. Not exactly sure of the origins of the dish but it was a recipe that my fathers Iraqi cousin had taught my mother who has made it ever since and it's known as "Dajaj Maghrebi" to us "Moroccan Chicken" but I'm unsure of it's authenticity in Moroccan cuisine, never the less it is delicious!

- Started out by caramelizing some onions as you see below (note all the yellow leaves covering my deck this morning, beautiful! )


- To the onions I've added some raisins and a bit of broth to moisten, seasoning it and adding a bit of sugar. Setting aside this mixture on a plate.

- Turned the heat up in the pot and covered the bottom with a good amount of salt, and added the chicken pieces when it was hot. The chicken browned while I kept an eye on it flipping it once and then adding broth and turmeric root, salt, black pepper and letting it simmer with the lid on.

*** If you don't have turmeric use ground turmeric spice, it is what we traditionally use anyway but since I had the root on hand I thought I'd give it a try. Also if you're using the root wear gloves when cutting/peeling because it stains the fingers badly.

- Prepared a baking dish and placed the pieces of chicken in a flat layer then spooned the delicious onion mixture on top of the pieces and poured in some broth. Add some finely minced preserved lemon to this if you wish, I did.

- Baked this on 375 until chicken was fully cooked, throughout the baking process you can baste it with the broth on the bottom.

- Once it was out of the oven I threw a bit of butter cubes into the small amount of sauce/broth in the bottom and mixed it until it was glossy then spooned the pieces of chicken over a bed of couscous.

As you see above the way we served it was without the parsley but I decided to garnish it with some parsley too and I found the flavours very complementary!

What a great Autumn dish!

A big breakfast before a big job!

Building a cedar shelf for my kitchen, so of course before I began a big breakfast was in order !

Cinnamon Apple Streusel french toast with whipped cream! Lots of maple syrup too!
If this french toast doesn't say Autumn then I don't know what does!