Friday, June 26, 2015

Roasted Garlic Scape & Tomato Pasta


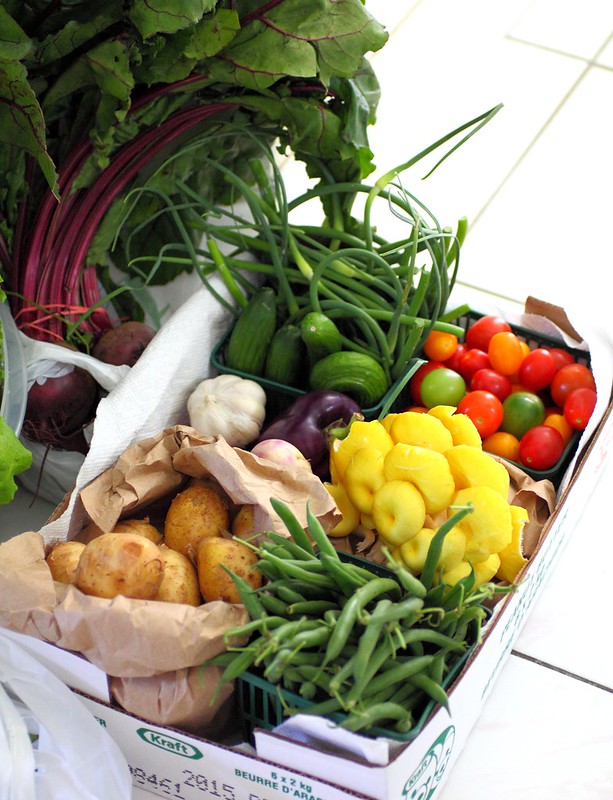
Spent a fabulous morning at the local farmer's market and picked up a selection of goodies, among them garlic scapes! This is the second year that I discovered these and immediately knew that I wanted to whip these up in a pasta dish. Luckily I already composed a dish in my mind within seconds and upon the recommendation of a nice Italian lady that started chatting me up at the market.

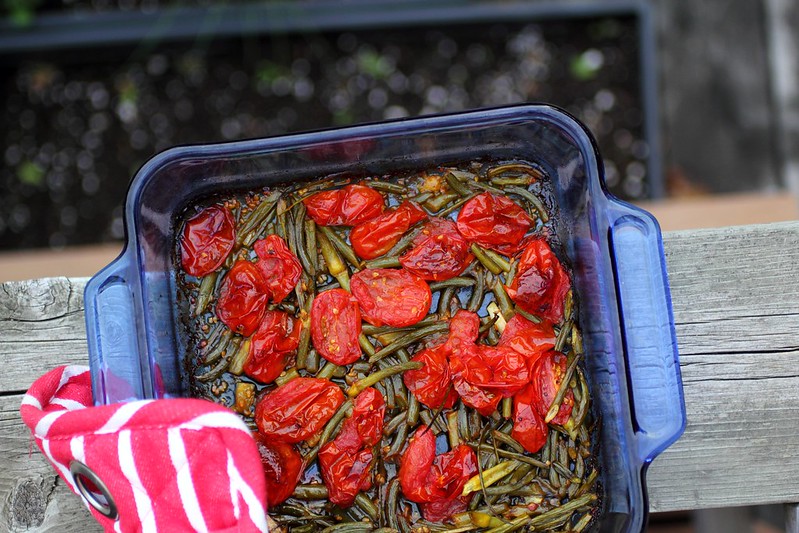
Originally I was intending to sautee the scapes and tomatoes but by the end of the evening, and honestly we were just so full of finishing up all the sweet peas that I threw the previously washed and prepped scapes into a roasting dish and into a preheated 400 degree oven to roast away. Of course I tossed the garlic scapes with the typical roasting seasonings, salt, pepper..olive oil and threw in a handful of halved grape tomatoes and a big clove of garlic which was smashed and roughly minced.

Immediately the pot of water went on the heat to boil and in 30 minutes I had dinner on the table.
I just love days like these!


Easy Roasted Garlic Scapes and Tomato Summer Pasta


1 handful garlic scapes, you can find them at your local farmer's market
1 handful grape or cherry tomatoes, or any roughly chopped fresh summer tomatoes
1 medium clove garlic, smashed and roughly chopped

A big glug of Extra Virgin Olive Oil (the good stuff, like from Olive That!
Salt & Pepper


Pasta of choice, I used spaghetti
1 small bunch of green beans (optional) 

Parmigiano Reggiano, shaved 
(use a cheese tool or vegetable peeler to shave off nice big pieces) 


Instructions: 
1 - Prep the veggies by washing and then chopping the garlic scapes in 1 inch length pieces. 
Slice cherry/grape tomatoes in halves

2 - Preheat oven to 400 F. In a roasting dish or glass baking pan toss your garlic scapes and halved cherry or grape tomatoes, garlic clove with the Olive oil. Season with Salt and black Pepper. Roast in pan until it looks like the photo below. 

3 - Bring pasta water to a boil, season with salt and add pasta and green beans. Boil according to package. 
Meanwhile your roasted veggies should be done and out of the oven, add a ladel full of pasta stock, that's the pasta water and stir the vegetables lightly, it should deglaze the casserole and remove all the yummy bits off the edges.

4 - When the pasta and beans are ready, drain (I leave a little bit of pasta stock/water in the bottom, just a couple of tbsps) and add them back to the pot. Add the roasted vegetables making sure to include every last drop of yummy goodness from the pan drippings.  Normally at this point I toss and close the lid on the pot and just turn the heat to the burner off. The pasta absorbs the last bit of juices and kind of "Becomes one" with the sauce.

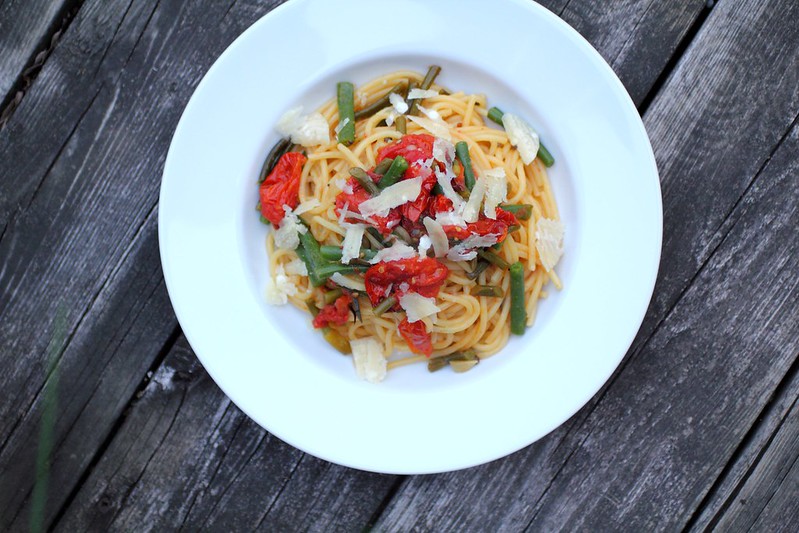
Plate and top with shavings of Parmigiano Reggiano cheese! Now dig in.... Pasta waits for no one!
Enjoy!

MMMMmmmm... I really really love pasta, and simple recipes like this just make me so happy :) 


Monday, June 22, 2015

Baby Gender Reveal Cakes!


Ready?!


TADAH!


Here is the baby gender reveal cake we did for my family over the weekend, and below you'll find an adorable ombre cake we enjoyed with my in laws on friday evening!

Our little Pumpkin!


Pink Vanilla & Sprinkles Cake (Recipe courtesy of Sweetapolita
Yield: One 3-layer, 8-inch round cake
**OR as I did in the yellow/blue cake above - Use 2 pans that are 9" round and cut each cake into 2 layers to yield 4 layers after it's baked and cooled.

Ingredients

For the Vanilla Layer Cake:

1-1/2 cups (341 g)(3 sticks) unsalted butter, at room temperature
2-2/3 cups (540 g) granulated sugar
9 (275 g) egg whites, at room temperature
4 1/2 cups (575 g) all-purpose flour
2 tablespoons (28 g) baking powder
1 teaspoon (8 g) salt
2 cups (480 mL) buttermilk, at room temperature (**or whisk yogurt with milk to a smoothie consistency in the required amount)
1 vanilla bean, split & scraped or 1 tablespoon (15 mL) vanilla bean paste (**I just used REAL Vanilla extract) 
1 teaspoon (5 mL) pure vanilla extract, best quality

** Add desired food colouring to the cake to tint the batter, I used a blue gel adding it sparingly to achieve the desired light baby blue

Instructions:

For the Vanilla Layer Cake:
Preheat oven to 350° F. Butter cake pans, line with parchment rounds, and dust with flour, tapping out the excess.
In a stand mixer fitted with the paddle attachment, beat the butter and sugar on medium-high speed until fluffy and pale, about 5 minutes. Lower the speed to medium and add the egg whites gradually, mixing until fully incorporated.
Sift the flour, baking powder and salt into a medium bowl. Mix vanilla extract and vanilla paste (or contents of vanilla bean) into buttermilk.
Alternate dry ingredients and buttermilk into creamed mixture, beginning and ending with dry ingredients. Mix until just incorporated.
Divide the batter evenly between the prepared pans. (If possible, weigh the batter in each cake pan on a digital kitchen scale to ensure even layers.) Smooth with small offset palette knife, and bake until a toothpick inserted in the middle of the cake comes clean.
Let pans cool on wire rack for 10 minutes, then invert cakes onto racks, gently, peeling away parchment rounds. Let cool completely.


Swiss Meringue Buttercream:

Make this recipe of buttercream X3 to have enough to frost the cake above.  Make sure to wash all utensils and bowls between batches with warm soapy water to remove any grease and then wipe down with vinegar as well to remove traces of grease of else your egg whites (first step) will not come together and whip and the recipe will fail.

Yield: 5 cups

Ingredients

5 large egg whites (30g each–total 150g)

1 cup plus 2 tablespoons superfine granulated sugar

3/4 pound (3 sticks) unsalted butter, softened, cut into cubes

2 teaspoons pure vanilla extract

Pinch of salt

(Yellow food colouring gel) 


Method

Wipe the bowl of an electric mixer with paper towel and vinegar, to remove any trace of grease. Add egg whites and sugar, and simmer over a pot of water (not boiling), whisking constantly, until temperature reaches 160 degrees F, or if you don’t have a candy thermometer, until the sugar has completely dissolved and the egg whites are hot.

With whisk attachment of mixer, begin to whip until the mixture is thick, glossy, and cool. Switch over to paddle attachment and, while mixing on medium speed continuously, add softened butter in chunks until incorporated, and mix until it has reached a silky smooth texture (if curdles, keep mixing and it will come back to smooth). Add vanilla and salt, mix well. You can also add a wide variety of flavourings, extracts, and more.

Note: Because it does take some time to make, I always make in batches of 3 (vanilla), because it freezes so well and saves time. A batch of 3 fits perfectly in a 5QT KitchenAid mixer bowl. You can then thaw, divide, add separate flavours, purees, etc. I have recently decreased the amount of butter I use in my buttercream, because I find it has a lighter, fluffier quality to it. I’ve adjusted the recipe accordingly, but you can add more butter if you prefer. I’ve also recently started heating the egg whites and sugar to 160° F, rather than 140° F, and I find the meringue comes together so quickly this way (just an observation, however 140° F has worked for me for years). Just a note!

Troubleshooting: After the egg whites are mixed add the butter in small thumb size pieces into the bowl while it whips and make sure it incorporates well, if it begins to split and go "soupy" place the bowl into the freezer for a couple of minutes and then rewhip using the paddle attachment and add the remaining butter in pieces until it looks like a butter cream. 

It helps to watch a couple of videos on youtube too before attempting to make this buttercream recipe. 


When assembling cake add a thin layer of lemon curd or jam onto the cake before the buttercream if desired. Frost and add sprinkles!