Showing posts with label kids. Show all posts

Tuesday, April 1, 2014

April Fools!


Kitty litter cake!

So much fun to make and more fun to eat... pranking people with it is also rather amusing

The recipe I'm using today is inspired by the "Better than Sex Cake" recipe which is wildly famous (so it seems!) and it's quite tasty. Here's my spin on it.
Cake:  2 X the following recipe


Hershey's Black Magic Cake
(I baked this recipe twice and it yielded 2 long rectangular pans)

Ingredients:
1/2 cup oil  (I used butter flavoured EVOO From Olive That!) or grape seed oil 
1 teaspoon vanilla extract
2 eggs
1 cup buttermilk (Or mix yogurt with water to a nice thick liquid creamy consistency) 

1 cup strong black coffee OR 2 teaspoons powdered instant coffee plus 1 cup boiling water (or just plain boiling water) 

Dry ingredients:
1 teaspoon salt
2 teaspoons baking soda
1 teaspoon baking powder
1-3/4 cups all-purpose flour
3/4 cup Cocoa Powder 
2 cups sugar


1/3 cup sweetened condensed milk, warm slightly in the microwave for a couple of seconds so it's easy to pour. 


Directions

1. Heat oven to 350°F.  Lay a piece of parchment to fit the bottom of a 13x9x2-inch rectangular baking pan.

2. Stir together sugar, flour, cocoa, baking soda, baking powder and salt in large bowl. Add eggs, buttermilk, coffee, oil and vanilla; beat on medium speed of mixer 2 minutes (Batter will be thin). Pour batter evenly into prepared pan.

3. Bake 35 to 40 minutes for rectangular pan or until wooden pick inserted in center comes out clean. Cool 10 minutes. Loosen cake from side of pan and remove from pans to wire racks. Cool completely.

For the second cake I removed from the oven and poked it all over with a skewer (not all the way through to the bottom) and then I poured some condensed milk (1/3 cup) by gently spooning some over the top and spreading it for the warm cake to absorb.

Set both cakes aside.

Salted Caramel Sauce: Recipe adapted slightly from Strawberry Chocolate Concoction 

Ingredients:

1 cup granulated sugar

3 tbsp unsalted butter, cut in three squares from the stick 
(should but firm - from the fridge is fine, but not melty)

2/3 cup heavy cream

1/4 tsp sea salt (fleur de sel is best)

You can use raw cane sugar, which is a light brown color, which is why my caramel is a bit darker than if you were to start with white sugar

Instructions
Heat sugar in a medium saucepan over medium heat, stirring occasionally with a rubber spatula.
Sugar will form clumps and eventually melt into a deep, golden-brown, amber-colored viscous liquid. At all times, be careful not to burn!
Once the sugar is all melted, immediately add the butter. The mixture will bubble, so do watch out. Stir until the butter has completely melted and is mixed well into the sugar.
Slowly pour in the heavy cream. Due to the reaction between the cold cream and hot sugar mixture, the final mixture will bubble vigorously. Allow the mixture to boil/bubble for 30 seconds. It will rise in the pan as it does so. Once again, watch that it's not burning!
Remove from heat and stir in salt.. Allow to cool.

Store in a tightly-capped jar in the fridge for up to two weeks.

Warm slightly before using again.

(You may have some leftover, which is ok) 


Whipping cream:

2 (500 ml) small cartons of heavy (35%) cream
3 heaping tbsp powder sugar
1 tbsp vanilla

(Whip all together in the blender or kitchen aid until it is fluffy but not too whipped, just softer peaks.)


Assembly

Prepare your food safe tub or container that resembles a kitty litter. Place a piece of parchment at the bottom and then set your first cake inside (the one without the sweetened condensed milk!)

Layer with half the whipped cream and drizzle caramel next.

The next layer of cake may have to be sliced horizontally into 2 layers if your container isn't a perfect square, otherwise there will be gaps as in my case where the tub got wider at the top and more narrow at the bottom.

I sliced the cake horizontally in a diagonal angle downwards from the middle and out to the side and was able to gently slide that piece over to cover the gap.  In the end it will look and taste delicious so no worries.


Another layer of whipped cream and more caramel.

At the very end and before serving sprinkle the entire top with toffee bits (skor?) and make sure no gaps are visible.  It will look exactly like kitty litter (more precisely the type I use which is corn litter by World's best cat litter)

Treat as a trifle and scoop pieces out.  It's absolutely delicious!


Friday, July 6, 2012

Puff Pastry Pizza Pockets

Preheat oven to 375 F. Try to work quickly with puff pastry and in a cooler area of the kitchen.

If the oven is not preheated in time just pop the tray in the fridge and then insert in the oven when ready to bake.

- Puff pastry (the frozen kind, thawed according to instructions)
- Pizza Sauce
- Mozzarella cheese
- Fresh basil

Roll out puff pastry, I used tenderflake and it looks like two squares in the pack, I rolled each into a larger rectangle and then cut down the middle for 2 pockets.

So in total the box made 4.

Add a little sauce in the middle, some grated mozarella, a few leaves of basil and fold over. Press and use a fork to secure the edges.

Egg wash using 1 egg, and bake on 375 F until golden and puffed.

Thursday, July 21, 2011

Honey Beehive Cupcakes


On sunday we all went to see the new Winnie the Pooh movie in theatres. Unfortunately we didn't like the movie all that much (and we're fans of the old Winnie the Pooh movie) but the treats we had afterwards made up for it.

These brown butter banana honey cupcakes are one of my new favourites, you can really taste the honey and the banana creates a moist cupcake. Try a swiss meringue buttercream with a bit of honey folded in, or if you like whipped cream that's fine too, sweetened with a hint of honey they are super easy to do and only require a handful of ingredients.

Brown butter banana honey cupcakes:


1 cup (2 sticks) unsalted butter

2 ½ cups all-purpose flour

1 ½ teaspoons baking powder

¾ teaspoon baking soda

½ teaspoon salt

1 cup sugar

½ cup honey

1 teaspoon vanilla

2 eggs, room temperature

1 ½ cups banana puree (about 4 bananas)

½ cup buttermilk (or yogurt watered down into the consistency of melted ice cream)

Preheat oven to 350°F.

To make brown butter: In a small heavy bottomed saucepan cook the butter over low heat until the butter is caramel coloured and smells toasty. DO NOT skim off any foam because those are the milk solids and they are what create the flavour once they toasts, because the rest is just melted fat and will not develop flavour on it's own.

Strain the mixture to remove the brown bits. (You can do this step a day ahead, it keeps in the fridge and then you just melt the butter again in the microwave when you're ready to use)

To make the cupcakes:

Using the paddle attachment, beat together the brown butter (which is now melted), sugar, honey and vanilla until it is cooled off slightly. Add the eggs one at a time, mixing well after each. Add the banana puree and mix until incorporated.

In a medium bowl whisk together the flour, baking powder, baking soda, salt. Set aside.

Alternate adding the flour mixture and buttermilk, starting and ending with the dry ingredients.

Line your cupcake pan with wrappers and begin filling them (not too much or it will over flow!)

Bake for 15-17 mins (17 worked great for me)


Swiss Meringue Buttercream:

Follow this recipe but instead of using the berry mixture add in a bit of honey at the end, 2 tbsp or so and a dash of salt and incorporate.


For honey Whipped Cream:

Pour your chilled heavy cream in the bowl and add some powdered sugar and whip until it's a beautiful creamy whipped consistency, add vanilla and drizzle in a bit of honey and fold in.

Decorate your cupcakes with either of the frostings above using a piping bag and a large round piping tip (I used Wilton No.2A) and begin piping a flat disk onto the cooled cupcakes and making circles smaller and smaller as you go higher to create a beehive look.


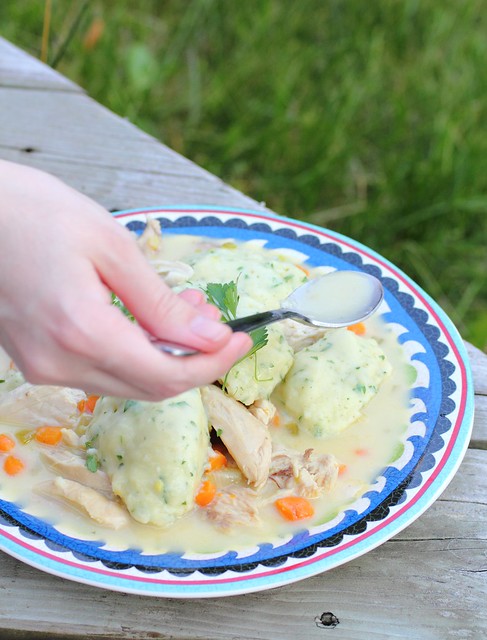
Later in the day we enjoyed Chicken and Dumplings, click here for the recipe.


Thursday, July 14, 2011

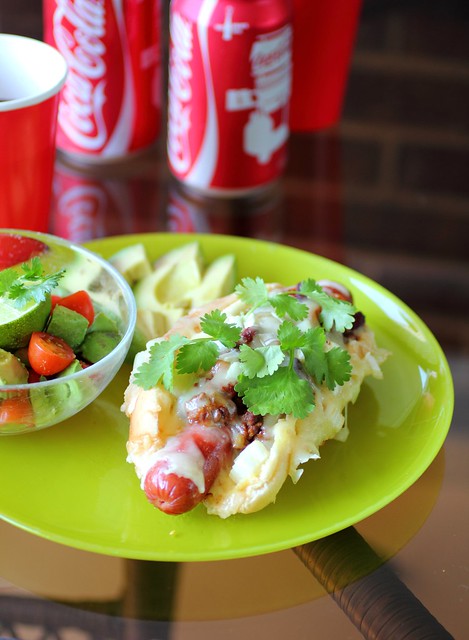
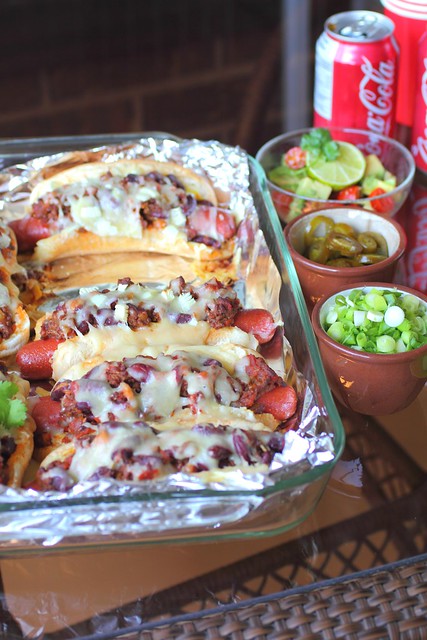
Chili Dogs


My homemade Chili


One or two nights in advance:

- Measure out dry kidney beans (or any beans of your preference)
I did a mixture of kidney and Steuben yellow eye bean (an heirloom

variety used in baked beans)

The rule is to wash, soak in a lot of salty water, so keep adding salt

until it tastes like the ocean.

Some people don't add salt to their soaked beans, which is fine but I

think the beans taste a lot better if they absorb some salt.


After 12 hours or a day, and you're ready to boil these beans simply

dump all the water into a large pot and bring to a boil then simmer on

medium low until the beans are tender (adding more water if it steamed

off) I keep the lid slightly covered as if it's closed tightly it

overflows sometimes due to the starchiness.

This may take a few hours but once they are tender (be sure to check a

few to make sure all of them are cooked and not just a random one and

then you end up with hard beans) They should keep their shapes almost

but be nice and tender.

Alternatively if you want to skip this step and use canned beans that's

fine too but I think more people should be going back to dry beans,

they are creamy and I think it takes the whole dish to another level.


Preparing chili

Ingredients:

- 1 lb ground meat (I use beef but you can use turkey or chicken..)
- 2 1/2 to 3 cups precooked beans

- 1 Chopped onion
- 2 medium Chopped green bell pepper

- Tomato paste (few tbsps)
- 1 can pureed tomato

- 1 tbsp molasses
- Worsterchire sauce

- Salt & Black pepper to taste
- Ground cumin powder

Water
Oil


Directions: In a large heavy bottomed pan on medium high heat add oil, sautee onions and peppers until they are transluscient or slightly softened (but not burning)
Bring the heat up to high and brown the ground meat really well, you want to see brown bits in the pot (this is extra flavour)

Add tomato paste and fry it around, add can of tomato, season with salt and pepper, 3/4 tsp cumin powder or so, molasses, worstershire sauce, strained tomato puree and water.

Simmer on medium low until the meat and vegetables are so very tender, I left mine on the stove for 6 hours and kept adding more water to the pot as it boiled off (even though the lid was on)


In the last hour or so add the beans to the pot and let them absorb the yummy flavours and simmer together.

If making the chili dogs below immediately let the chili cool a bit before topping them.


Chili Dogs:

Ingredients:

- Your favourite hotdog (I used all beef)
- Hotdog buns (something basic from the supermarket)

- Your homemade Chili (cooled)

- Mayonaise
- Mustard (dijon or prepared yellow)
- Grated Cheddar cheese (we used old white cheddar)
- Chopped onions (according to preferance)


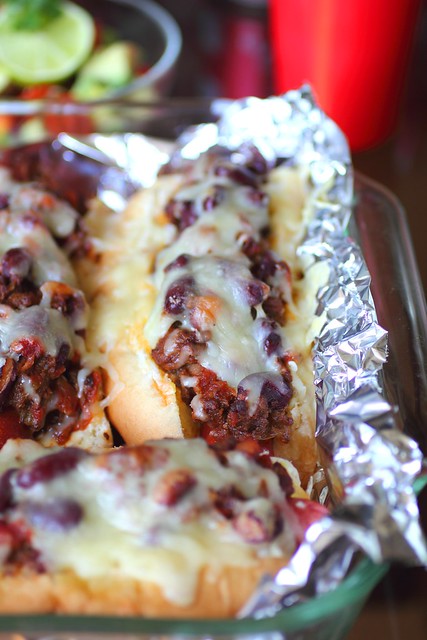
1. Set the oven on 350 and line a pan with foil.

2. Begin adding 1 tbsp of mayo to each bun and spreading it on the top

and bottom side.

3. Add a bit of the mustard to the bun and spread over the mayo.

4. At this point it's fun if someone is helping you because it's a bit

of an assembly line :) Put the hotdogs in the buns and lay in the

tray on the foil side by side.

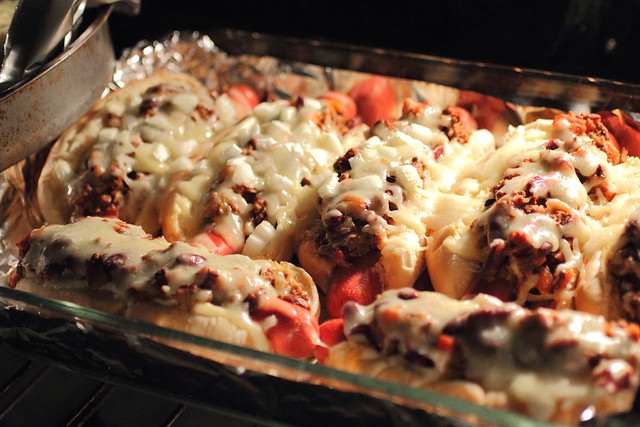
5. Top each dog with a heaped serving of chili.

6. Sprinkle with cheese

7. Add chopped onion

Bake for 45 mins and serve immediately. These will be bubbling, the buns will be toasty on the outside and soft on the inside (due to the mayo tip) and the more tasty the chili is the better the flavour of the chili dog.


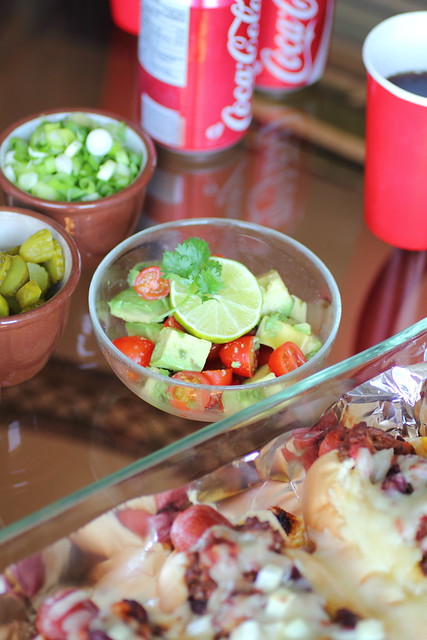
Fun toppings for serving:

- Pickled Jalapenos
- Chopped green onions
- Fresh Cilantro
- Homemade Guacamole (chopped tomato, avocado, red onion, cilantro, bit

of garlic, salt, cumin, drizzle of oil, squeeze of lime)

* Thanks to In The Wabe for the inspiration and to my sister for the use of some of her prep photos below


Tuesday, June 21, 2011

One Pot Pasta


Here is a delicious and fun pasta recipe that uses only one pot.

Ingredients:

- Your favourite tiny pasta ( these little tubes are cute!)

- Your favourite beans (Here I used kidney because it was in the fridge - but it works great with white cannellini beans or any bean of your choice) The beans should be already cooked or use canned. Strain and rinse your canned beans.

- Olive oil
- Garlic
- Tomato paste (or a pure strained tomato sauce)
- Salt & Pepper
- Worcestershire sauce

Directions:

1-In a medium sized pot on the burner set to medium.

2-Add olive oil and sautee some garlic (this depends on your taste!)

3-When it's beautiful and fragrant add your tomato paste and fry it around so it caramelizes (cooks that raw taste out of it)

4- Throw in your pasta (Yes, dry pasta!!) and fry it around.

5- Add enough boiling water from the kettle to cover the pasta (the pot is hot and the water hitting it can cause some steam so be cautious!)

6- Add all the other seasonings in, salt and pepper, a splash of worcestershire sauce.

7- Stir the pasta so it doesn't stick to the bottom and add your beans. Cover and reduce to Medium low.

8- You can peek and stir from time to time .. it will be done very quickly!


Enjoy !!


Sunday, June 5, 2011

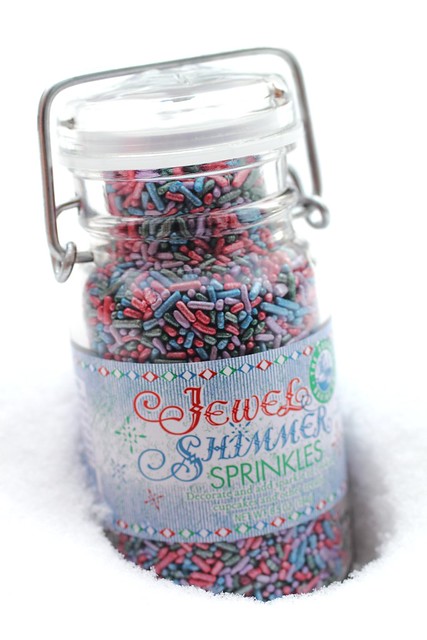
Jewel decked rims


Here's a little fun idea to do for kids or if you're a big kid like myself you may enjoy it!

Thanks to the lovely inspiration from la receta d ela felicidad I gave it a whirl using white chocolate and my shimmery sprinkles I picked up from my trip to McEwen's gourmet market in the winter.


Oh and in the backround you see the yummiest moist chocolate cake ever - made from leftover cupcake batter in the loaf pan. So good! ^_^