Wednesday, June 25, 2014

The Simple Things in life...


Last week tried my first pizza on the grill and it left me wondering why I haven't done this earlier! There are a couple of tips to keep in mind so I'm going to share my experience and feel free to share any tips if you've done grilled pizza.

I start with homemade dough as usual. It's easy! 

I've shared a recipe on my post about Pizza Buns earlier on the blog, here 

After the first rising divide the dough into smaller balls and set aside to rise. 

Start up the grill and the trick is to try to maintain a consistent medium heat heat.  My BBQ has a cast iron grill so I oil/season it so the dough doesn't stick. 

Flatten out the dough and roll rather thin using a rolling pin between two sheets of parchment.  You can do a couple and stack them between the parchment and then just take them outside on a tray. 

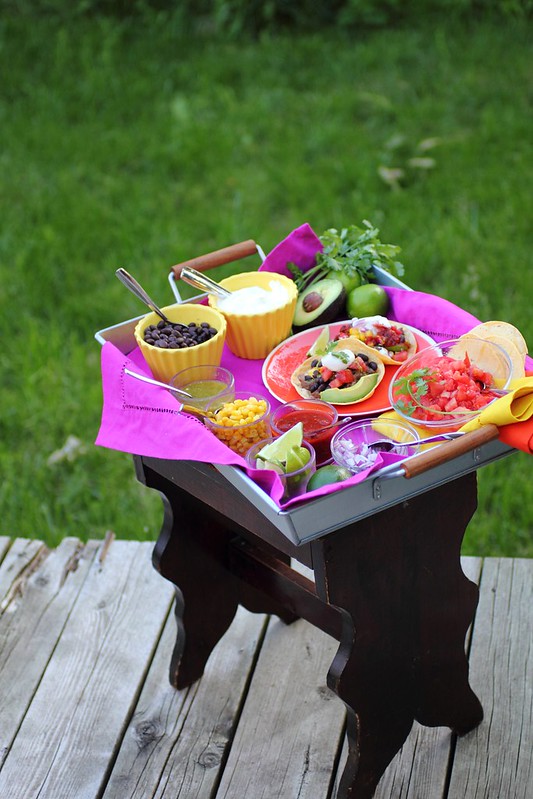
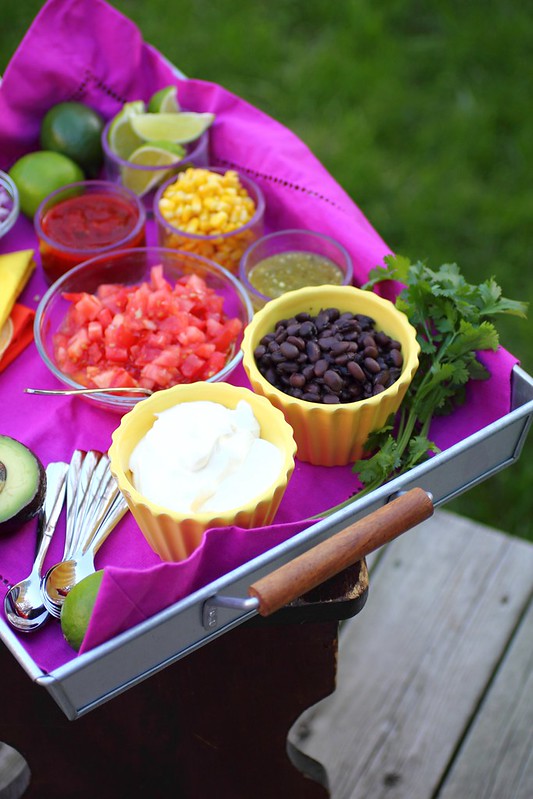
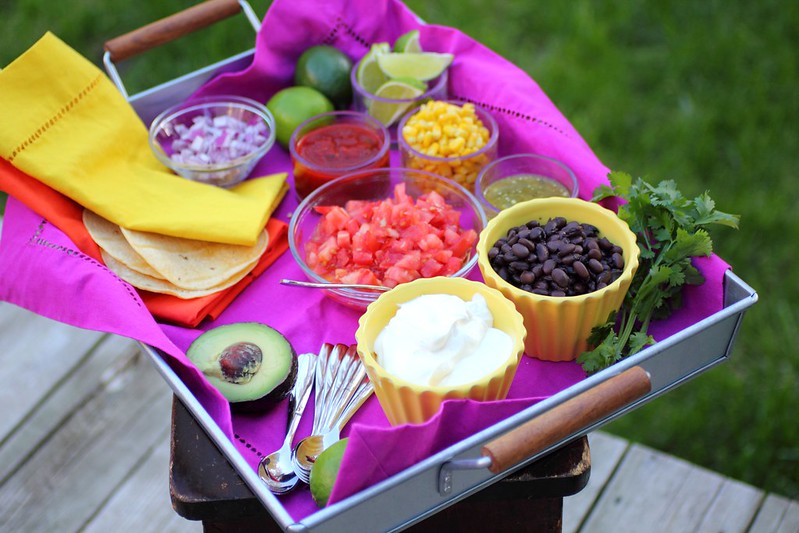
The process goes very quickly so have your toppings all chopping up and ready to go on a tray next to your bbq. Remember don't load up on toppings and nothing too watery, keeping it simple is the best way to go because it cooks super quick. 
If you're using mushrooms, fry them up in advance in a frying pan on high heat in some oil and season with salt. That way they're ready to go without releasing water all over the top of the pizza or staying raw.

The part of the dough that you placed on the grill (bottom) is going to end up being the top of the pizza (where you spread the sauce) so you really just want it to get light grill marks and dry out. Just a minute or so. 

Now using tons flip over the dough to the other side and at this point working quickly you can spread some sauce on it and add the cheese and a couple of toppings.  Instead of sauce you can do slices of fresh summer tomatoes. 

I keep the temperature on the left side of the grill a little lower so I can slide the pizza over and finish cooking them with the lid down, this helps to melt the cheese and get things going without burning the bottom. 

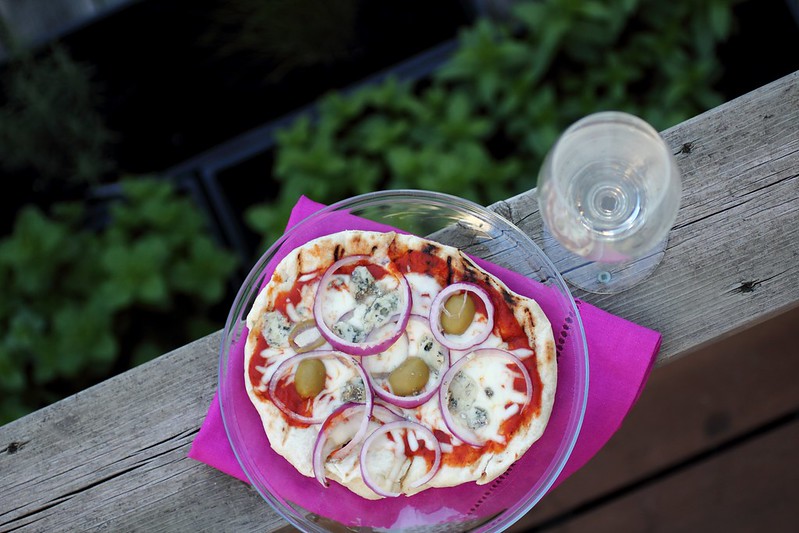
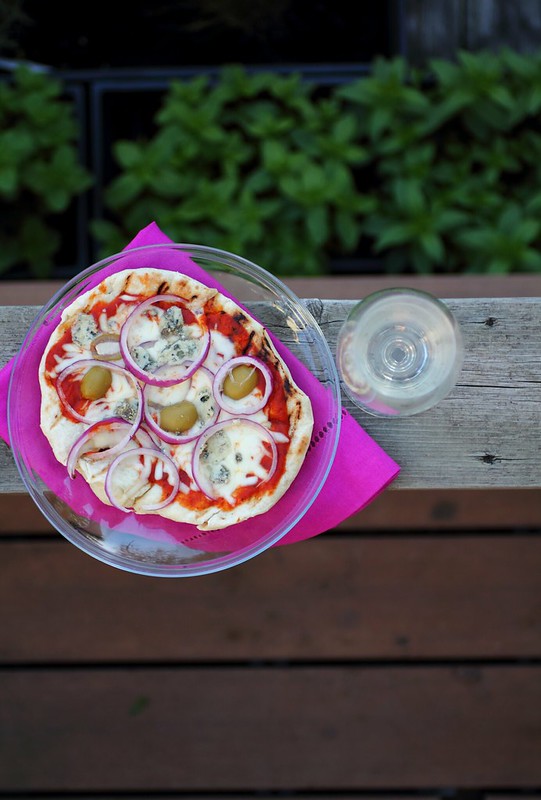
Once the cheese is all melty and toppings warmed through remove the pizza and serve. 

I did red onion, blue cheese and blue cheese stuffed olives on my pizza 


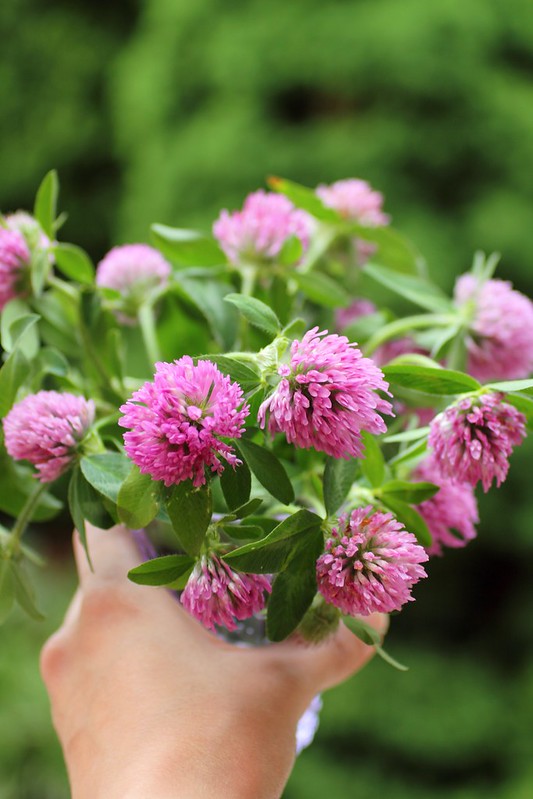
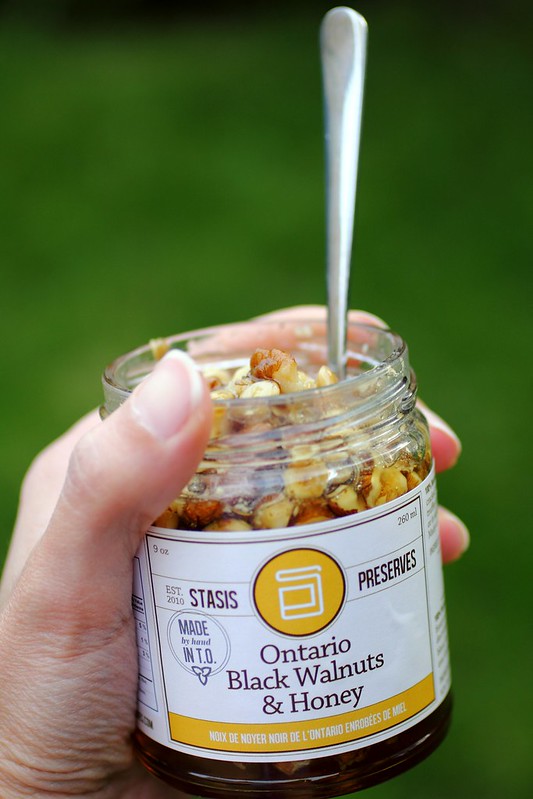
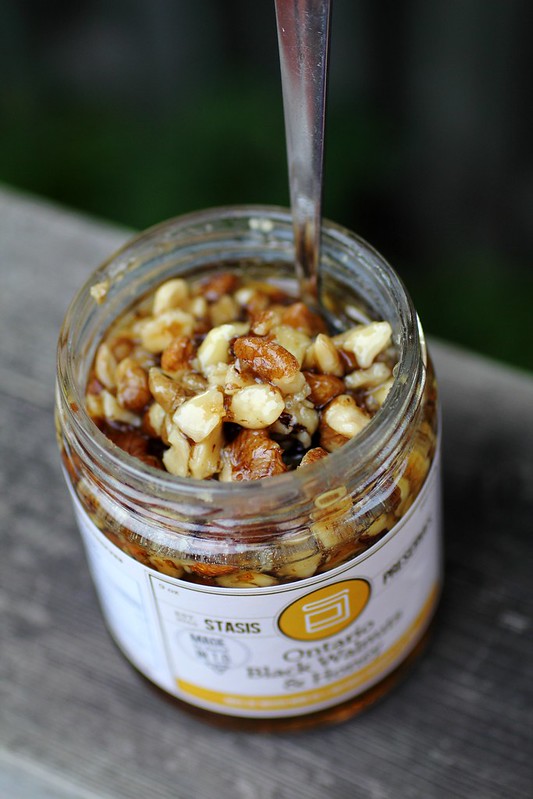
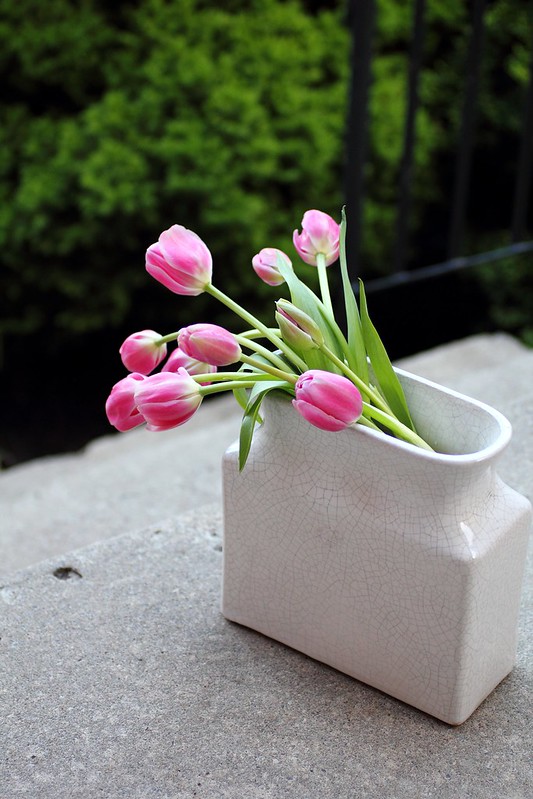
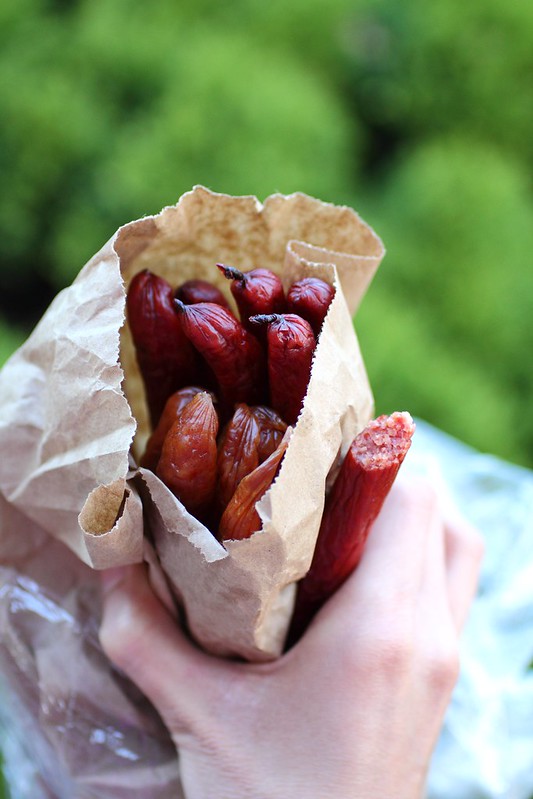
A couple of my fave things lately have been, clove blossoms, they make fabulous cheap and cheerful flower arrangements, and this delicious Ontario black walnut honey from Country Cheese Company
The honey pairs perfectly with those fresh grassy medium or soft cheeses like the spring time favourite Dutch Graskaas or Gouda, although I tried it with blue cheese and really enjoyed it!


Taco II (Vegetarian)


Delicious Tacos, simple, vegetarian and yummy! I didn't load up on the toppings because this is the recipe the lovely lady at the Latin Market has instructed me with.

I took some liberties and made a "red rice" using a long grain rice, tomato paste, green pepper and corn.

Rice
1 1/2 cups long grain rice, rinsed until the water runs clear and drained 


2 tbsp oil - Olive oil is a good healthy choice
1 tsp butter or ghee (optional)

1/3 cup chopped green bell pepper

1 tbsp tomato paste or 2 tbsp precooked tomato based sauce - like a pizza sauce

1 tsp salt

1/4 cup frozen corn (optional)

2 cups hot boiled water


Heat the oil in a pot and once it's sizzling add your drained rice, fry it around until all the grains are coated with oil.  Add your tomato paste too at this point to cook off the raw flavour. If you're using pizza sauce add it later after the liquid. 

Add your green pepper, liquid, salt and corn, let it all come to a boil. Add the butter if desired and cover. Simmer to the lowest setting for 20 minutes.

Black beans: 

It's always nice to cook your beans from scratch, and it's super simple. Start the night before by washing the dry beans in a large bowl just to remove any dirt, if there are any stones or foreign objects among the beans be mindful to remove them.

Cover with plenty of water and let them soak overnight. 

The next day add the beans and half the soaking water to a pot, cover with plenty of fresh water and bring to a boil. Simmer until almost tender then season the water with salt and cook until beans are tender and creamy but not falling apart.

Cool the beans in their boiling liquid and then store in the fridge in the liquid for a couple of days or drain from liquid and freeze in a ziplock bag until ready to use. It's very convenient to have on hand when you can add handfuls to different recipes.

Taco:

To assemble tacos simply heat your corn tortilla for a couple of seconds in a dry pan set to medium high heat.
Top with rice, black beans and your authentic Salsa (I picked up one from a latin market, there are many varieties to choose from but I opted for more of the smokey ones)

Top with chopped red onion and more corn, and serve with lime and cilantro.
Delicious! 


Monday, June 23, 2014

The Taco Stand


This taco bar was so fun to put together!! It's super easy to do and you can scale it for as many people as needed. 

I've been wanting to do this for such a long time and after discovering the coolest latin shop inside the St.Lawrence Market in Toronto things just fell into place. I can't tell you the names of the sauces and whats in them but all I can say is that they are so good! And this market has them stocked.


I don't have to tell you about their wide array of homemade corn tortillas either, as they speak for themselves! They're great having in the fridge and all you have to do is warm them in a dry pan for a couple of seconds on both sides to soften. 


Another recipe I plan to make is using a rice and black bean filling them topping it all with one of the yummy smokey red sauces, this recipe was mentioned to me by the lovely shop keeper at the market. 

Some of the items to include in a fun taco bar, that is both adult and kid friendly are: A meat as your basic taco filling, or a cooked spiced bean filling as a vegetarian and vegan option!  I had some grilled beef tenderloin from a couple of days earlier so I just sliced it up into thinner strips.

Have a good amount of toppings on hand like: Black beans - always freshly soaked and home boiled is tastier but you could opt for the low sodium canned variety.

Guacamole or slices of avocado, be sure to squeeze a generous amount of lime juice over slices to avoid them from turning brown

If you want to avoid serving up the onions separately go with a pico de gallo which is a fresh tomato salsa of chopped tomatoes, onions and chilis, add cilantro and a squeeze of lime to bring it together.  You're getting big flavour and it's all inclusive.

Salsa/Sauces, definitely try to get your hands on some authentic Mexican ones. I have a red smokey sauce here and a salsa verde, which is a green sauce made of tomatillos

Then add corn, lime wedges, sour cream, fresh cilantro... and enjoy!


Friday, June 20, 2014

Spring 2014


A couple of weeks ago I celebrated 3000 photos on IG and just enjoying some time reconnecting with my love for photography.


Sunday, June 15, 2014

Baba Ghanouj


Super smooth Baba Ghanouj

Baba Ghanouj is a middle eastern Mezze dish, it's a dip consisting of smokey eggplant and tahini along with lemon and garlic.. it's one of those recipes I don't make too often and always wonder why when I finally  get around to whipping up a batch.

Today's variation is the Hareesa olive oil (from Olive That!) and Aleppo pepper garnish which add a touch of spice and colour!

Start by adding one of two large eggplants on the BBQ, it's easy to just brown/roast them on the grill.  I punched a bunch of slits in them with a sharp paring knife and let it do it's thing while I grilled up some meat.

Now it all depends on how long you want to roast it but personally I like to really char the skin and caramelize the layer of eggplant under the skin until it's almost sweet.  I'm also partial to removing the seeds, and they come out easy if you just cut it open with a knife, flatten it out and pull out the seed pods that are kind of evenly spaced from core to outer wall of the eggplant. Do this when it's cooked of course.

Separate the skin from the flesh by gently peeling or scrapping it away and add all the flesh to a blender.

In a separate bowl I whisk tahini with a bit of water until it's smooth and add 3 cloves of smashed garlic with juice of 2 lemons and a sprinkling of salt.
Add as much of this tahini sauce into the blender as desired and whip as chunky of smooth as your preference. I like a smoother dip.

Adjust the seasoning and enjoy with pita!


Caramelized Figs


Though it's not quite fig season I found these gorgeous plump purple figs at the historic St.Lawrence Market in downtown Toronto and couldn't resist picking up a carton, they were just so lush and ripe. A couple of them went into my breakfast this morning... and here's how!
Warm Caramelized figs:


A drizzle of maple syrup
1 tbsp sugar per fig
Figs
A couple of drops of water

Cut figs into halves and drizzle maple syrup in a saucepan or skillet, add the figs cut face down and sprinkle sugar over. 

Begin browning on medium heat, add water to dissolve the rest of the sugar and cook until sugar thickens into a syrup and figs bubble and become coated in the syrup. Make sure there is no crystals of sugar on the sides of the pan, if there are simply brush the sides with some water to dissolve them back into the syrup. 

Serve on warm pancakes with sauce and more warm maple syrup!

Enjoy!


Wednesday, June 11, 2014

The start of BBQ season

 We started BBQ season just right with this super easy and tasty feast, I was inspired by some fabulous produce from the St.Lawrence Market of fresh plump favas and wild garlic ... truly one of the best things I've eaten in a while!

It's also the first time I do chicken hearts on the grill, and I must say I'll never go back to cooking them any other way. This method was recommended to me by a friend and it's just DELICIOUS!

Enjoy!


Grilled Fava Beans
Detailed recipe here
Toss the fava beans in their skins with olive oil and salt.

Heat your grill to a medium heat and grill the beans, flipping once to char both sides. The objective is to maintain a medium heat and allow the beans to steam inside the shell, they should be tender and easy to pop out of their skins.  Squeeze with lemon and enjoy!

Chicken hearts shishkebob

Chicken hearts
Worstershire sauce
Salt
Olive oil

Toss, and marinade briefly. Skewer on presoaked wooden skewers of metal skewers and grill until done.


Wild Garlic

Brush with oil and season with salt
Grill until soft. Remove the garlic from the grill and add to a bowl, seal with plastic wrap. You need to let these steam to tenderize.
Before eating remove the outer layers and eat the soft insides, season with more salt if needed.


Grilled Artichokes:

Follow the instructions here and enjoy!

Throw a couple of lemon halves on the grill too, they're perfect for squeezing over this feast


Leg of lamb: Super easy boneless leg of lamb, preseasoned from New Zealand spring lamb and simply grilled on medium (350 F) on the BBQ for about 35 minutes.


Monday, June 9, 2014

Easy Lamb Pie


One of my favourite recipes that I learned from my mum is to simple add raw spiced meat onto bread, be it a rustic spread out dough, already baked flatbread, or puffy pita, like the greek kind and I've been making these more and more because it's kind of a two step recipe with two ingredients and who doesn't love that!

You might have seen these mini pitas in early 2013 when I made these while my windows were being installed, I did a video on it too.
On busy weeknights I do a lot of flat open faced pitas where I put the spiced (its' much better with onion I think!) ground lamb or beef onto a pita and bake until the meat is done and the juices have soaked the bread beneath, it is so good!


This is a rough recipe to make your lamb "sausage" or spiced ground meat, it's better if you let it marinade in the fridge for at least a day


Raw ground lamb
Finely minced onion and garlic
Salt & Black pepper

Chopped mint
Lemon zest
Lemon juice

Arabic 7 spice (optional) 

Sumaq (optional) 


Focaccia breads


Cut the breads horizontally, either all the way through or leaving one side attached slightly

With a spoon stuff the raw ground spiced lamb into the bread and spread it out, keep it a nice even layer but be generous because meats shrink as they get cooked. 

Wrap the sandwiches in parchment lined foil and bake on 400 on the top shelf of the oven until the meat is done, you may need to flip them so one side of the bread doesn't get too crispy. 

There is enough fat in the lamb that you dont need any oil, if you're using beef then you may need some olive oil. 

The objective is just to get the meat cooked and the bread to stay soft.  

Remove from the oven and serve with a salad! 

Enjoy!


Strawberry Rhubarb pull apart Bread


For National Strawberry Rhubarb Pie Day I wanted to do something a little different, and since I was so taken by the delicious and tender dough from the Polish fruit pastry pies I made a couple of years ago I knew this was what I was making!

The inspiration for the style of bread art just came through browsing the net and seeing an interesting savoury Hungarian bread made in this fashion, definitely going to be doing something savoury with this cool design.

Strawberry Rhubarb pull apart bread

Dough - Using a Jagodzianki Polish recipe by Ania's kitchen

Mix the following and set aside for 20 minutes:

1/2 cup of lukewarm milk
1 1/2 tsp of instant yeast
2 tbs of white all purpose flour
2 tbs of white granulated sugar


Mix the following in your kitchen aid bowl:

2 cups of white all purpose flour
1/3 cup of white granulated sugar
Pinch of salt

Have these handy:
2 eggs
1 tsp of pure vanilla extract

1/4 cup of melted butter, cooled


In to the bowl of your stand mixer add all the ingredients for the
dough (flour, sugar, salt, eggs, vanilla) except melted butter. Add proofing yeast mixture and mix with a paddle
attachment until all is well combined. Add melted butter and mix for
another couple of minutes.


Spray with oil and cover with a kitchen towel. Let rise until doubled
in size ( around 2 hours).


Filling:

Roasted Strawberry and rhubarb

1 cup rhubarb, chopped
3 cups chopped strawberries

Sprinkling of sugar

Lay out the fruit in a single layer in a glass baking pan (like a lasagna pan) and bake on 425 F until they're all syrupy and roasted/caramelized. Keep an eye on it so it doesn't burn.

Once it's done it'll be pretty mushy like a jam, add more sugar, enough to your taste and a squeeze of lemon juice (about 2 tsp)

Set aside.


Assemble:

Sprinkle the dough with a little bit of flour and knead with a dough
attachment until the dough is smooth and elastic. (around 5 minutes).
Transfer the dough on to your working surface sprinkled with some
flour. Knead it few more times and then divide it in two and roll into two circle on a parchment paper.

Spread the rhubarb strawberry mix onto the first round without going too far onto the edge, kind of like making a pizza, leave a rim.

Put the other round on top gently and seal the ends all around.

Cover with plastic wrap and allow it to rise for 20 minutes.

Now place a glass as your guide in the middle and start cutting strips like the rays of the sun around the whole dough, use a sharp knife to cut through the dough nice and neatly.

Begin pulling one piece slightly and twisting twice clockwise or counter clockwise depending on your preference. Lay the piece back down and begin with the next until all of them are twisted.

Beat one egg and brush over the entire top, then sprinkle some sugar.

Bake on 360 for 20 minutes, be sure to check so the bottom doesn't brown too fast, you may need to double up on baking trays.


Thursday, June 5, 2014

Rosemary EVOO hair treatment

So a couple of weeks ago I made the fresh rhubarb mouth wash that was featured on the Dr.OZ show from Bryce Wylde and Frankie Flower's new collaboration book on health and plants.  This blend of rosemary and Olive oil is meant for preventing hair loss by increasing the blood flow to the roots of hair and scalp. 

Not that I'm balding I figured why not give it a try!  For those of you who don't know, I've suffered from psoriasis from an early age and it still remains to be on my scalp so from time to time I will do a warm EVOO hair treatment, and when I saw this I figured why not throw some rosemary in and see how it goes!


Recipe:
1/2 cup EVOO - don't be afraid to use the good stuff - Warn it in a small sauce pan on low for just a few seconds until you can stick your ringer in and it feels warm to touch.  This way it absorbs in the scalp much easier.

A couple of sprigs of fresh rosemary, remove the leaves and leave the stalk behind.

Blend it all in a blender until it looks like the following:


At this point I would strongly suggest running it through a fine sieve to get rid of all the woody rosemary or else it will make the biggest mess in your bathroom.  Use the strained rosemary/evoo mixture and put it all over your hair.

How long until you'd wash it off?  Well, I usually do my EVOO treatment for about 2 hours minimum so just wrap your head up and forget about it.  It's best to do on not so clean hair, so whenever you're closer to showering and maybe on a weekend.

Afterwards you'll smell like rosemary, which is nice!

If you have any leftover in your blender, maybe you wanna make some rosemary evoo potatoes or something ;)

Rhubarb Kuchen


My mum's Apfelkuchen turned Rhubarb Kuchen 

Beat:
2 eggs
1/4 sugar

Mix: 
1 1/2 flour
1 1/2 tsp b.p
a pinch of salt

Heat oven to 350 F

Other ingredients:

3/4 cup Milk

Add enough milk to make a thick batter.

Pour the thick batter into a greased metal tray, or use a piece of parchment at the bottom (much easier) 

The baked result is a layer of dough/batter that is very thin/flat so spread it out using a spatula, my mother always made it in a flat baking tray type pan. Spread it nice and evenly.

Fruit: Apple, peeled, cored and sliced thinly or in this case Rhubarb, cut into thin 1/4 inch rings

Layer the thin slices of apple leaving a small edge (kind of like a pizza but thinner) 


To make the crumb topping

Ingredients:

1/2 cup butter, softened 
1/2 cup granulated sugar
1/2 cup firmly packed light brown sugar
2/3 cup all-purpose flour + a tbsp if needed
1 teaspoon ground cinnamon  (I use the real Sri Lankan Ceylon cinnamon)
Pinch or grating of ground nutmeg

Mix all the dry ingredients and add the butter, using your fingers press them together to create little crumbs. 

Lay the crumb mixture over the fruit in an even layer and bake for 30 minutes in a  preheated 350 F oven.


Monday, June 2, 2014

#Herbamare Zesty - Shakshouka


Day 2 of the Herbamare challenge and I'm using AVogel's Herbamare Zesty in this Middle Eastern fave, Shakshouka !

Such a simple and delicious recipe, and I think the perfect dish to use Herbamare Zesty!

Zesty is as yummy as our favourite Herbamare Original with the addition of chillli and horseradish, both giving it a nice punch of flavour, almost like that secret ingredient that you just can't put your finger on, it isn't really spicy or hot so don't be discouraged from trying it!

I'm making this Shakshouka using duck eggs but use whatever eggs you prefer.
Ingredients: 

-1 can of san marzano whole tomatoes, drain the liquid sauce and use only the whole tomatoes

(if you'd like to use fresh tomatoes then by all means chop a bunch up in rough cubes)

-3 tbsp olive oil


-1 medium red onion
-2 medium cloves garlic

Optional ingredients that I didn't use today:

Green bell pepper 
Parsley

3-4 eggs (I used duck eggs)

Start by heating the olive oil in a pan and sauteeing the onion on medium heat until translucent, then add the garlic until fragrant and add your whole tomatoes (or fresh chopped) 

If you're adding green bell pepper you would sautee it with the onion*

At this point season generously with AVogel Herbamare Zesty and let the tomatoes cook down and release the liquid. You want a bit of sizzling to happen at the bottom of the pan, that makes for the best roasted flavour. Cover and let the steam escape from the lid but cook on medium low for a while.

When you're almost ready to serve simply make a small indent into the tomato and drop your eggs in, continue to cook on medium with the lid off until your eggs are cooked to your liking.

I used 3 eggs but you can do up to 4 with one can of tomato. 

Don't forget to season the egg with a little more of the #Herbamare Zesty and enjoy with flat bread and salad as a breakfast, lunch or dinner entree!


Sunday, June 1, 2014

AVogel How do you Herbamare?


It's officially June!  That means it's time for the AVogel Herbamare challenge.

They asked a handful of Canadian Food Bloggers "How do you Herbamare?" and this June, in my upcoming posts I'm going to share with you all how I responded to that question using the delicious seasoning salts.

Herbamare is such a versatile product that you can literally use it on EVERYTHING!

Just as salt enhances the flavour of foods of ingredients it's sprinkled on Herbamare adds an extra savoury punch with all those delicious dehydrated infused vegetables.  It's a truly unique, all natural and interesting product and I hope you all give it a try.

Head to your local health food store or health isle at the supermarket and test it out, let me know what you think.

Don't forget to hashtag #Herbamare on facebook, twitter, Instagram and other means of social media to participate and see my posts as well as the other bloggers using Herbamare. 

Now for this recipe.

This recipe is in two parts and the first part must be made the day before, however it's super simple so just boil 'em and forget about it. 

Ingredients:
Medium to Large Russet potatoes (as many as you wish)

Wash the potatoes and boil in a large pot of salted water until tender, just until a knife can be inserted easily. 

Drain and cool, now place in the fridge overnight. 

The next day: 

Gently slice the potatoes with a sharp knife in wedges, leave the skins on.

Remaining ingredients:
AVogel Herbamare Original

Olive oil
2 tbsp finely chopped fresh parsley
1 1/2 tsp Garlic butter or evoo or homemade version 

(Homemade garlic evoo/butter) 
Grate a ton of garlic and sautee in some butter and evoo in a small saucepan. When it smells like garlic bread it's ready, remove from heat and chill in fridge, you can use this in many recipes. 


Heat the oven to convection roast or bake on 420 F and toss all the wedges of potato with some EVOO until well coated. 
Lay flat on a piece of parchment on a large baking sheet. 

Sprinkle Herbamare Original generously over all the potatoes, bake until crispy and brown, you may need to flip them half way through if you're not using convection roast setting in your oven. 

Once they're all brown place them in a bowl and add the garlic butter/evoo with the parsley. Toss until they are all coated and serve immediately!