 I'm back... with Bastirma! The cloudy winter months kept me away from photographing and blogging about food but I assure you it hasn't kept me away from enjoying some great recipes in these last couple of months.
 Here I have a very very special recipe.
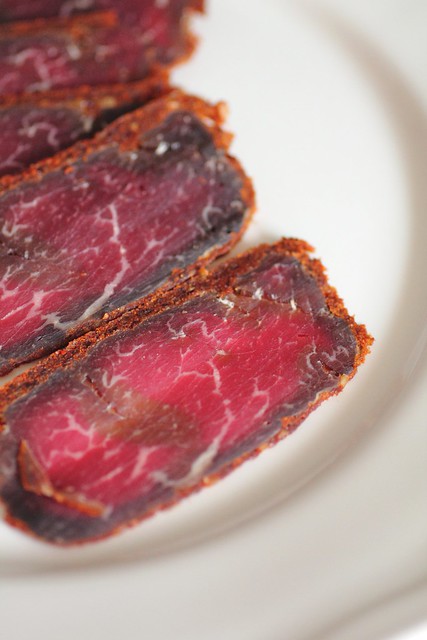
A little backround about bastirma, it is a cured meat that is popular in Egypt, Lebanon and Armenia, it's supposedly very easy to make because people often make it at home and no special curing ingredients required.
I've only enjoyed this delicacy once in my life when my mother attempted to give it a go in our home in Kurdistan, she asked me to go to the butchers and fetch the leanest piece of meat possible and then she took advantage of the new bedrooms being constructed on the second level of our home where she hung the prepared piece of meat for a number of days.
All I remember was that it was supposed to be very smelly, strong and pungent which is why she hung it upstairs and we all anticipated the day we could taste it.
I have fond memories of having breakfast after dark upstairs on the roof right under the staircase leading up to the high rooftop. We had a lovely spread of cheese, fresh bread and thinly sliced bastirma, it had a unique flavour because the coating of paprika, garlic and fenugreek used to preserve the meat flavored it nicely as well.
I have fond memories of having breakfast after dark upstairs on the roof right under the staircase leading up to the high rooftop. We had a lovely spread of cheese, fresh bread and thinly sliced bastirma, it had a unique flavour because the coating of paprika, garlic and fenugreek used to preserve the meat flavored it nicely as well.
A couple of weeks ago I found myself with a piece of tenderloin (purchased at a pretty descent price) so I thought I'd give it a go.
I looked up a lot of recipes, and many of them varied significantly but the I decided to stick with the recipe my mother was taught because it was fairly simple.
I used the following ingredients:
- Beef tenderloin, cut in half and one half used (I would have made the other if I knew it would come out so good!)
- Lots of salt.
- Lots of salt.
- Preservation spices, both ground fenugreek and paprika
- Lots of fresh garlic.
- Butchers twine, needle and scissors
- Butchers twine, needle and scissors
Some kind of dripping tray / rack comes in handy too.
1- The first step is to clean the meat well and then place on a bed of salt (turn to coat both sides well, everything must be covered)
Set in the fridge (I felt it was safer though it's supposed to be able to be preserved without the use of a fridge)
2- the following day I transferred the salted meat to the dripping rack placed inside a tray (meat should still be coated with salt, if not cover the bare areas)
Still set inside the fridge with something heavy on top to weight it down. As the salt began drawing out the liquid I dumped the water/moisture.
I believe I did this for 2 days or so.
3- I removed the meat at this point and rinsed the salt off well then rolled it in a paper towel and weighed it down again for a third day in the fridge.
4- Now it was time to coat and hang it. I used a twine and a needle to push the thread through (not too close to the edge of the meat could tear and fall, so two or three inches down worked)
The coating was made of lot of fresh garlic (grated/rasped into a paste) and then paprika, a bit of dry ground fenugreek and a dash of salt.
The coating was made of lot of fresh garlic (grated/rasped into a paste) and then paprika, a bit of dry ground fenugreek and a dash of salt.
Use gloves for the next step because I didn't and my hands smelled for days! (I couldn't even sleep for the entire night after making it because the smell was so strong and triggered my appetite all night long - now I know why they say not to use food or citrus scents in the bedroom)
Wear the gloves and use (boiled and cooled water or distilled water) to make a paste out of the spice/garlic mix then begin to rub it all over the hanging meat (set it in a comfortable place to work, then you can move it somewhere else later)
Cover it all very well, none of the meat should be exposed and the layer should not be too thick or too thin.
At this point I hung it in my kitchen, it smelled for about 24 hours then I couldn't smell it anymore (if you have a place to hang it like a secure garage, balcony or basement, try that, should be a cool well ventilated place)
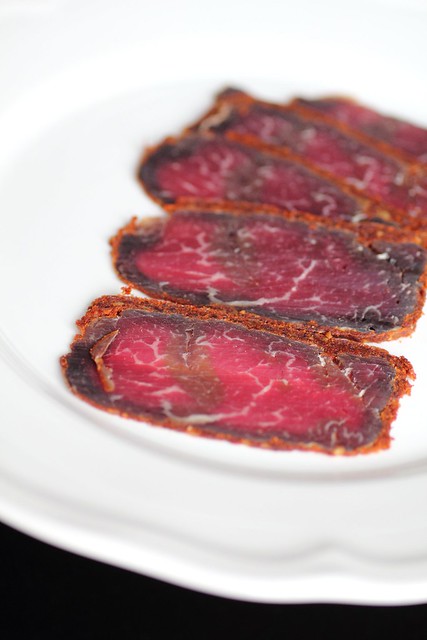
I hung it for about a week and the coating was very dry at this point.
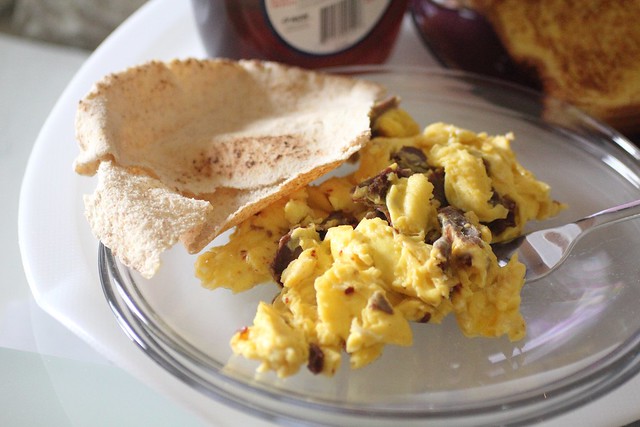
Once it's ready you can slice it thinly and include a plate on your breakfast, dinner or mezze table with some bread. You could even fry it in some butter/ghee/samna and then fry or scramble eggs with it and enjoy with bread (if it's too salty remove some of the coating, and don't salt your eggs)
I'm extatic that it worked out, my worries were mostly that the meat would rot or something would go terribly wrong but it was so lovely and red on the inside (they say if it turns grey for some reason it's still ok, same taste and should be perfectly fine)
So if you're feeling adventuress enough, give it a go and let me know how you like it :) And if you have an arabic store near you and would like to try some head over there and see if they've got some available to see if you like it before attempting to make it.
I'm sure other cuts of meat can be used, I'm going to try it with a rib eye roast perhaps because it's less expensive.