Showing posts with label lebneh. Show all posts

Sunday, October 13, 2013

Homemade 2 ingredient froyo


Lately one of the biggest trends out there is froyo, and I'm seeing these froyo bars popping up literally EVERYWHERE!  You know the places where you grab a cup, fill it up with the frozen yogurt of your choice which is dispensed right out of the machine in the wall?  There is a selection of toppings in different stations varying from candies to sauces to fresh fruit which you can top your yogurt with to your heart's content.  Once you've created your masterpiece then it's off to the cash where you "weight & pay" and you're all set to enjoy your froyo (which hopefully didn't melt at this point)

It's a fun concept and I can see the appeal, especially for kids but I find myself always feeling ripped off because my cup averages at about $8-$12 a visit and if I stop into 10 places within the summer then I'm out over 100 bucks!

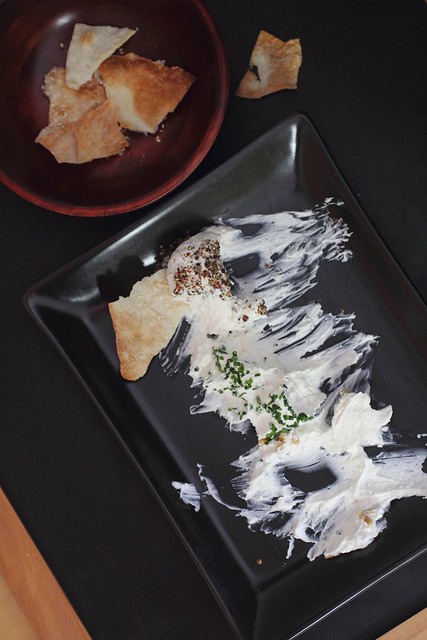
I've never been the biggest fan of froyo (or sweet yogurt anything, you probably read me express this in other posts - I prefer my yogurt/lebneh plain, salted and drizzled with good olive oil and a nice piece of warm flatbread on the side) but I've learned to embrace this refreshing dessert because my family members drag me to one of these places from time to time.

Since I'm fortunate to have a handy ice cream machine at home I've been feeling challenged to create a froyo that would rival any of these places and satisfy my family.  It's been on my mind for a while but I put it on the back burner for a while because for some reason I felt pretty intimidated by the idea.  Little did I know that it is probably the easiest thing on earth to make!

When I finally worked up the courage to search for a recipe online I stumbled upon this one, it mentions how it rivals pinkberry (I've never been but often see pretty photos of their froyo online, I don't know if they have locations in Canada)
When I scrolled down to the recipe I couldn't believe how few ingredients were listed!

So without further adew here it is!


I put my own twist on it and I began with 4 containers of plain bulkan style yogurt which I whisked each very well and dumped into a paper towel lined sieve (something with feet is good and slightly elevated since a lot of water will be coming out of the yogurt)

I put an upside down bowl into a large bowl and set the sieve on top of that. Placing a piece of plastic wrap onto the top (just to prevent dust or anything from falling in) it went into the fridge for 24 hours.

What I was left with is a thick greek style yogurt (might have to spill out the water a few times if it is filling up in the bowl below)

Now for a sweetener, I used white sugar but feel free to try any type of sugar you like (maple sugar would be nice and healthy!) Don't use honey or maple syrup, it will not freeze well and become all goopy.

I used about 3/4 cup of sugar and a dash of vanilla extract (totally optional)
The recipe says to mix the sugar in and refrigerate for an hour, I forgot this step and churned it immediately once the sugar was dissolved into the thick yogurt. 

Now simply churn it in your ice cream machine according to instructions!
It is preferable to remove the froyo and refrigerate for a couple of hours before serving as it melts quickly otherwise.

Served with orange blossom honey and toasted walnuts.


Tuesday, December 4, 2012

My Middle Eastern twist on the Cheese Ball


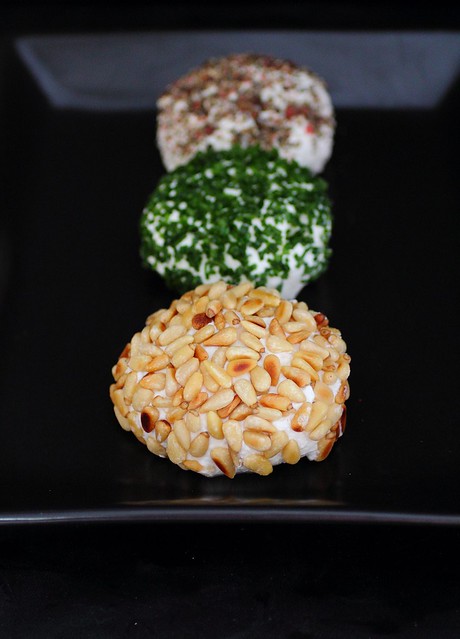
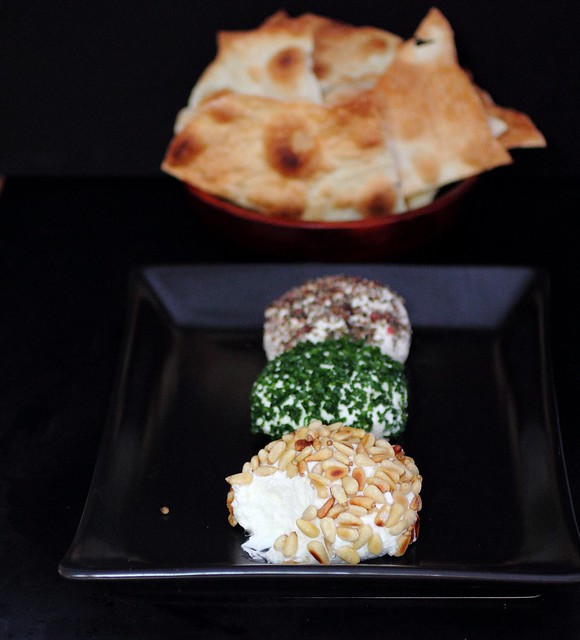
This is my take on the cheese ball (the famous creamy soft appetizer served with some kind of crispy chip/bread at parties)
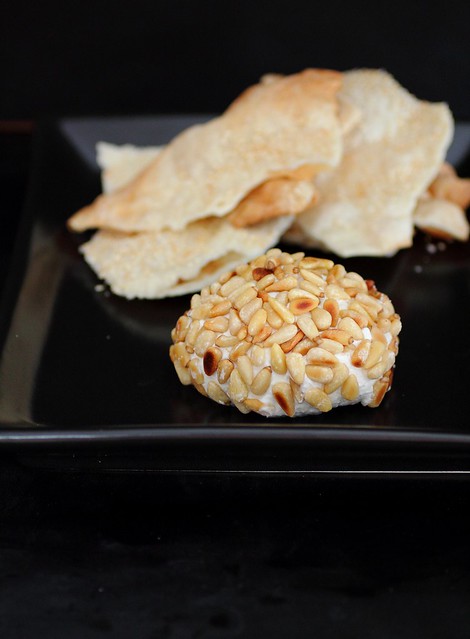
Here I've added my middle eastern touch, and served them with homemade lavash (it's really quite simple to make, you will be surprised!)

We'll start with the cheese ball(s)
I used soft savoury cheeses, no cream cheese here.

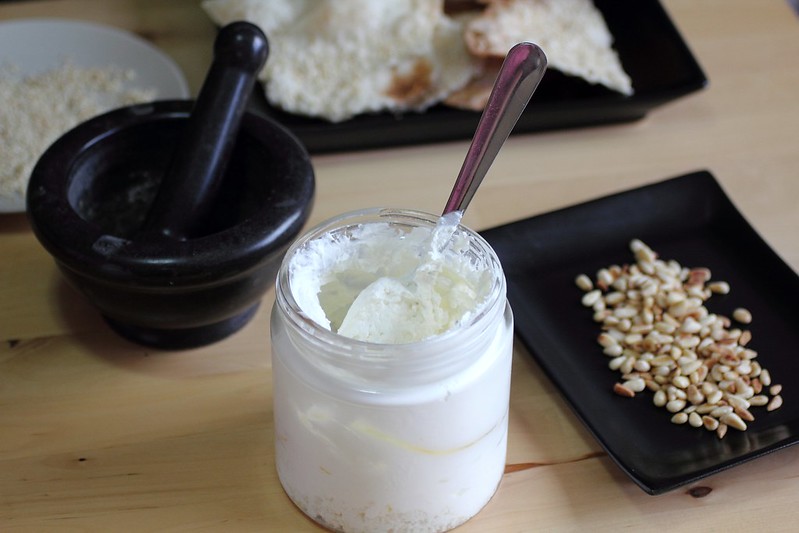
I start with Lebneh, it is a middle eastern soft creamy "cheese" made from yogurt, basically it's a strained yogurt, it's like the greek yogurt and it's the base used in dips or just served as a breakfast food drizzled with olive oil (you've probably seen it on my blog before!)

I made my lebneh because it's super easy, check out the basic instructions here  on my flickr.  Salt is added during the process so it's already seasoned.
Even after it's done sometimes lebneh can release some water as it sits so before making the cheese ball I strain some again by placing the desired amount into a bowl lined with a clean sheet of paper towel (a sturdy paper towel brand is better so that it doesn't fall apart)  This should just make it extra firm. 

The second cheese I used is goat cheese and the third variety is sheep's feta, both these were whisked together until creamy (feta is a bit crumbly so it requires a bit of whisking into the goat cheese to yield a smooth consistency)

I'd say the ratio is 50 % lebneh to 30%  goat cheese and 2% feta. 

For flavourings you can add whatever you like into the cheese or leave it plain!  I grated a small clove of garlic and zested a lemon (just a bit!)   No need to add salt and all these cheeses have enough salt. 

Blend, mixing well (you can set it in the fridge overnight!) 

Now I roll out 3  pieces of cling wrap and 3 big dollops of this creamy cheese mixture in the centre of each piece, divide in thirds so they end up equal.
Bringing the sides of the cling wrap together and twisting at the base, I tried to shape the cheese into a ball as best as possible then set them all on a flat plate and into the freezer for 20 minutes or so (this will make it easier to work with)


For the first cheese ball I rolled it in toasted pine nuts (toast the day before if you'll be too busy the day of your party!)  Toast in a dry pan on medium low until golden and move them around so they don't burn. 
Set aside to cool.

When I was ready to roll I  removed the balls and simply rolled the top and sides because this cheese is  pretty soft so I upwrapped the top and held the bottom with the cling wrap and just dunked top facing down into the pine nuts and then covered the sides by rolling gently. 
I set it gently on a plate and pulled out the cling wrap from under. 

The same technique worked for the chives (chopped finely) and the last one is covered in a light dusting of coloured pepper corns that were crushed in the mortar and pestle. Using coloured peppercorns is better that straight black ones because the green/pink peppercorns are more mild (I don't even think they're actual peppercorns but more like in the berry family or something)   I love black pepper but this one might be too intense for some people so you could switch this for anything else that you prefer. 

LAVASH:

The lavash is of 3 or 4 varieties but the dough is all the same.  It begins with the awesome recipe from my favourite bread book, Peter Reinhart's "The Bread Baker's Apprentice"  (I travelled around the world clutching this book and preferred to leave behind clothing just so that I'd be able to carry this book back with me! It is that fantastic!)

Check out the recipe here in case you do not have the book, but I highly recommend getting it.

I made the dough, proofed it overnight (yeah yeah, a little longer that I should have but anyway.. ) then divided it into 3 equal sized balls.

I rolled out and baked one at a time.  Rolling out each piece really thin, drizzled and wiped it with a bit of water and sprinkled the first with toasted sesame seeds, the second I did half with toasted cumin seeds and sea salt and the other half with toasted corriander seeds and sea salt. 
The last one I grated a bit of aged parm cheese (the real stuff) 

Bake, break 'em up into bite sized pieces and start dipping!!

Enjoy your party!


Sunday, May 8, 2011

Lebna - Yogurt Cheese


LOVE Lebna! I used to take lebna sandwiches to school as a child, trumps cream cheese any day. It's smooth, creamy, tangy, and a little salty. Mmmmm. You'll see it on most breakfast tables in the middle east drizzled with a little bit of oil and scooped up with pieces of fresh flat bread.

If I remember correctly Queen Rania of Jordan herself on the View said she used to take lebna sandwiches to school.

Here is how to make it:

For the container above I used 3 yogurt containers (650 g) They were on sale!

Add all the yogurt into a big bowl and add some salt (1 tsp per container should be ok)
Whisk it all up and pour into a sieve that is lined with a paper towel or cheese cloth.
In recent years I've found paper towel to be very durable (scotties?) They don't tear or leave any fragments in the cheese and they're sanitary because I can just throw it away.

I line the sieve really well then pour it all in. (make sure the sieve can stand properly, or has little feet) then place the sieve over another bowl (lots of water will come out)

I remember my mother hanging a tied up cheese cloth around the sink faucet and leaving it there overnight but now I put the bowl in the fridge and in 2 days it's done.

Keep removing excess liquid so it does not reabsorb if it collects, and then turn out the paper towel to reveal you're beautiful cheese. Store in a container and enjoy with a little drizzle of good olive oil. Perfect for your breakfast table, brunch or mezze spread.